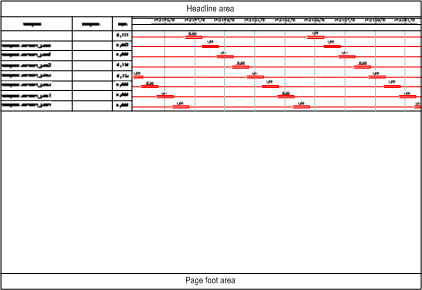
|
|
(Original Document)
|
|
Step
|
Action
|
|---|---|
|
1
|
Stop the recording. Trending Tool can only define a page layout if the document is closed.
|
|
2
|
Use the Page setup command from the File menu. This command opens the page setup configuration dialog box for Trending Tool documents.
|
|
3
|
Change the Trending Tool page setup properties using the different tabs in the dialog box, then click on the OK button to close the dialog box and apply the changes made.
NOTE: The page setup options available in Trending Tool are detailed in the sections concerning the Trending Tool page setup dialog box. |

|
General Tab
|
|
|---|---|
|
Dialog Box Options
|
Description
|
|
Document type
|
Select the type of document you wish to create in this box.
|
|
Column printing
|
If functional analysis is selected, you can choose which column to print.
Select the column you wish to print in this box:
|
|
OK
|
Close the dialog box and apply the page setup.
|
|
Cancel
|
Close the dialog box without applying any changes.
|
|
Trend Diagram - Trend Curves Tab
|
|
|---|---|
|
Dialog Box Options
|
Description
|
|
Scale
|
To print a trend diagram or trend curves, select the scale of the document.
|
|
Print modules
|
Select the modules you wish to print in this box:
|
|
Page Tab
|
|
|---|---|
|
Dialog Box Options
|
Description
|
|
Orientation
|
This area enables you to choose whether you want to print your document in landscape or portrait mode.
|
|
Portrait
|
Click on this button if you wish to print in portrait mode.
|
|
Landscape
|
Click on this button if you wish to print in landscape mode.
|
|
Configuration
|
This button opens a dialog box in which you can select the printer and its parameters.
|
|
Scaling
|
Use this area to change the size of the printed document.
|
|
Scale to
|
Check this box to change the printing scale of the whole document. Type the required expansion or reduction percentage directly in the editor or use the arrows on the right.
|
|
Adjust
|
Check this box to adjust the size of the printed document to a particular number of pages. Type the required number of pages in the editor or use the arrows on the right.
|
|
OK
|
Close the dialog box and apply the page setup.
|
|
Cancel
|
Close the dialog box without applying any changes.
|
|
Margin Tab
|
|
|---|---|
|
Dialog Box Options
|
Description
|
|
Margin
|
Select the document's margins in this area.
|
|
Top
|
Type in the document's top margin in millimeters in this area.
|
|
Left
|
Type in the document's left margin in millimeters in this area.
|
|
Bottom
|
Type in the document's bottom margin in millimeters in this area.
|
|
Right
|
Type in the document's right margin in millimeters in this area.
|
|
Borders
|
Select a border mode for the printed pages in this area.
|
|
On Each Page
|
Select this option to print a frame on each page of the document.
|
|
No Border
|
Select this option if you do not want to print frames.
|
|
OK
|
Close the dialog box and apply the page setup.
|
|
Cancel
|
Close the dialog box without applying any changes.
|
|
Header/Footer Tab
|
|
|---|---|
|
Dialog Box Options
|
Description
|
|
Left
|
Select this tab to fill in the left area of the header or footer.
|
|
Center
|
Select this tab to fill in the center area of the header or footer.
|
|
Right
|
Select this tab to fill in the right area of the header or footer.
|
|
Text Field
|
Directly type the text you wish to add to the header or footer in this area. You can add key words that will be reproduced on the printed document, either directly or via different controls beneath the editor.
|
 |
Click on this button to change the character font associated with the area. This button opens the standard Windows font management dialog box.
|
 |
Click on this button to show the current date in the printed area.
|
 |
Click on this button to show the current time in the printed area.
|
 |
Click on this button to show the name of the recording file in the printed area.
|
 |
Click on this button to show the name of the current module in the printed area.
|
 |
Click on this button to show the page number in the printed area.
|
 |
Click on this button to show the number of pages in the document in the printed area.
|
|
Add
|
Select a field from the drop-down list and click on this button to add the field to the printed area.
|
|
OK
|
Close the dialog box and apply the page setup.
|
|
Cancel
|
Close the dialog box without applying any changes.
|
|
Options Tab
|
|
|---|---|
|
Dialog Box Options
|
Description
|
|
Print Time Stamps
|
Check this box to print the recording's time stamps.
|
|
Print Alarms
|
Check this box to print variable activations on the trend diagram's dating scale.
|
|
OK
|
Close the dialog box and apply the page setup.
|
|
Cancel
|
Close the dialog box without applying any changes.
|