|
|
(Original Document)
|
|
Step
|
Action
|
|---|---|
|
1
|
Stop the recording. Trending Tool can only define a printing zone if the document is closed.
|
|
2
|
Use the Printing zone → Define command from the File menu. This command opens the Trending Tool document selection dialog box.
|
|
3
|
This box contains the list of the time stamps defined in the current module of the document concerned. Select two time stamps to determine the printing zone of your module and click on the OK button to close the dialog box and apply the changes made.
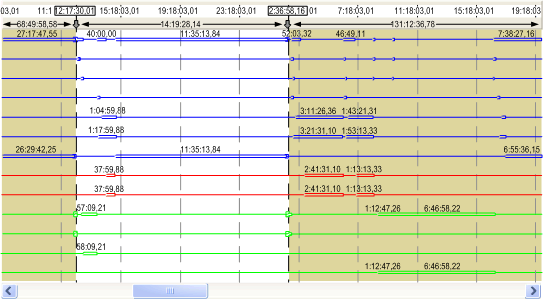
The white area visible on the trend diagram is the zone of the current module 2 which will be printed.
NOTE: You can use the Printing zone → Cancelcommand from the File menu to delete the printing zone defined in the current module of the document concerned. The time stamps will be still be defined in this module. |

|
Dialog Box Options
|
Description
|
|---|---|
|
Printing zone
|
This zone is determined by a starting stamp and an ending stamp in a list containing the time stamps existing in the current module.
The time stamp representing the starting point of the printing zone must be selected in the left-hand box; this is called the starting stamp.
The time stamp representing the ending point of the printing zone must be selected in the right-hand box; this is called the ending stamp.
|
|
OK
|
Close the dialog box apply the changes made.
|
|
Apply
|
Save the changes made without closing the dialog box.
|
|
Cancel
|
Close the dialog box without applying any changes.
|