|
I/O Scanning Configuration
|
|


|
Original instructions
|
|
I/O Scanning Configuration
|
|
|
Original instructions
|
|
Step
|
Action
|
|---|---|
|
1
|
Open Control Expert on your PC.
|
|
2
|
Configure or open an application using one of the modules or CPUs mentioned above.
|
|
3
|
In the Project Browser, open Communication → Networks.
|
|
4
|
Select an Ethernet device to access the device IP configuration screen.
|
|
5
|
In the Module services dialog, select YES for IO Scanning:
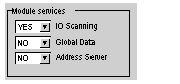 Result: The IO Scanning tab is enabled (no longer grayed out).
|
|
6
|
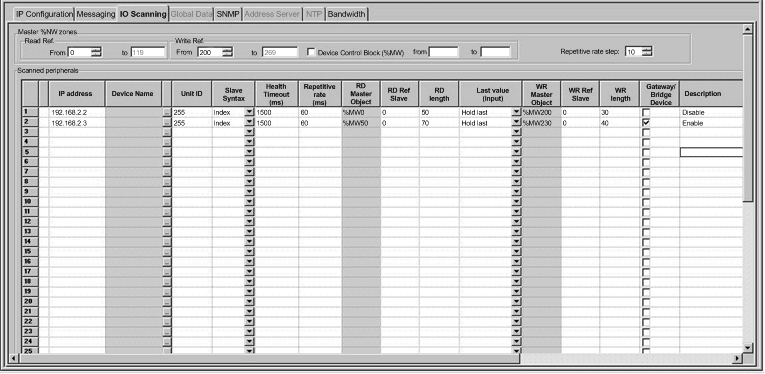
Select the IO Scanning tab:
 |
|
7
|
Enter the parameter settings in each column as described in the following I/O Scanning Parameters topic.
|
|
8
|
Select the validate check box in the upper tool bar to confirm the I/O scanning parameter settings:
 |
|
Step
|
Action
|
|---|---|
|
1
|
Only use this step if you are configuring an ETY module. For CPUs, go directly to step 2.
Set the address of the beginning of the internal words (in the application memory), which are dedicated to I/O scanning:
|
|
2
|
For each device, enter the IP Address.
|
|
3
|
To configure a device (Advantys island or DTM), click the ... button to open the Property box to start the device configuration software.
For an introduction to this procedure for Advantys, click here.
NOTE: While the Property box is open, I/O scanning cannot be edited. |
|
4
|
Enter the Unit ID Modbus slave address for each device, if necessary.
|
|
5
|
Enter a Health Timeout value in ms, if required.
|
|
6
|
Enter the repetition periods of the remote device (scanning period of the slave).
|
|
7
|
Only use this step if you are configuring a CPU. For ETY modules go directly to step 8.
For each device, enter the address of the master PLC variables in the RD Master Object.
|
|
8
|
For each device, enter the address of the variables read in each slave Slave Ref. (read).
Choose the syntax of this value using the Slave Syntax for this line.
|
|
9
|
For each device, enter the number of words to be sent in read format in Length (read).
|
|
10
|
Select the input fallback mode in Fallback value (read).
|
|
11
|
Only use this step if you are configuring a CPU, for ETY modules go directly to step 12.
For each device, enter the address of the master PLC variables in the WR Master Object.
|
|
12
|
For each device, enter the address of the variables written in each slave Slave Ref. (write).
|
|
13
|
For each device, enter the number of words to be sent in write format in Length (write).
|
|
14
|
To allow slower TCP/IP network devices (i.e., gateways and bridges) to be compatible with the I/O scanner:
|
|
15
|
For each device enter, if necessary, a comment in Description.
|
|
Step
|
Action
|
|---|---|
|
1
|
Enter the IP address of the device.
|
|
2
|
If necessary, enter the device’s Unit ID Modbus slave address.
|
|
3
|
Select the scanning period of the slave.
|
|
4
|
Enter the address of the read variables of the slave Slave Ref. (read).
|
|
5
|
Enter the number of words to be sent in read format in Length (read).
|
|
6
|
Enter 0 in Slave Ref. (write) (if the Slave Syntax is set to Index).
|
|
7
|
Enter 0 in Length (write).
|
|
8
|
On the following line, enter the same IP address.
|
|
9
|
Enter the same Unit ID Modbus slave address, if necessary.
|
|
10
|
Select the same period.
|
|
11
|
Enter 0 in Slave Ref. (read) (if the Slave Syntax is set to Index).
|
|
12
|
Enter 0 in Length (read).
|
|
13
|
Enter the write destination address in Slave Ref. (write).
|
|
14
|
Enter the number of words to be sent in read format in Length (write).
|
