|
Declaration of the CANopen Master Using Sycon and EDS Import
|
|
|
(Original Document)
|
|
Step
|
Action
|
|---|---|
|
1
|
Start the Sycon tool from the Windows Start menu, or from the configuration screen of the TSX CPP 110 card (in Control Expert software), click on the icon
 Result: the SyCon tool will appear on the screen.
|
|
2
|
Select the command File → New
Result: the following screen appears:
 |
|
3
|
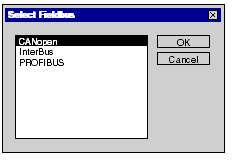
Select CANopen then confirm by clicking Ok.
Result: a blank structure will appear on the screen.
|
|
4
|
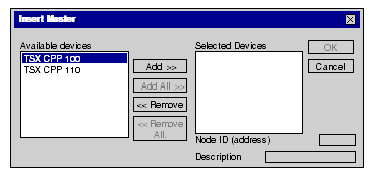
Select the command Insert → Master.
Result: the following screen appears:
 |
|
5
|
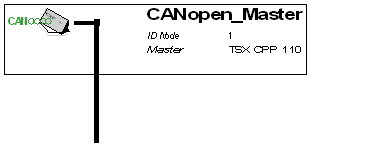
Result: the following structure appears:
 |
|
6
|
Save the CANopen project under the name Demo_cfg.co.
Note: Make sure to remember the place where the .CO file is stored, as you will need to use the it again when loading the file into the configuration of the card running Control Expert.
|
|
Step
|
Action
|
|---|---|
|
1
|
Launch the Sycon software if it is not already running, in order to declare the bus master.
Result: the SyCon tool will appear on the screen.
|
|
2
|
Select the File → Copy EDS option to import the EDS files using Sycon.
|
|
3
|
Select the Node_2.eds file from the D:\Advantys_Projects\Quick Start directory to import the EDS file from node 2.
Note: Refuse the bitmap import, as this file was not created.
|
|
4
|
Repeat stages 2 and 3 for node 3 with the Node_3.eds file in the D:\Advantys_Projects\Quick Start directory to import the EDS file from node 3.
Note: Refuse the bitmap import, as this file was not created.
Result: the two EDS files are now available for insertion in the two CANopen slaves.
|