|
How to Configure a CANopen PCMCIA Card
|
|


|
(Original Document)
|
|
How to Configure a CANopen PCMCIA Card
|
|
|
(Original Document)
|
|
Step
|
Action
|
|---|---|
|
1
|
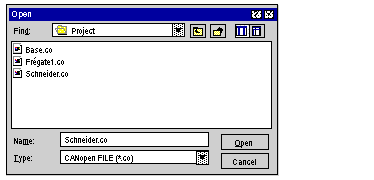
Click Select Database:
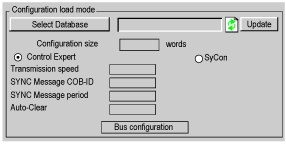 Result: a screen like this appears:
 |
|
2
|
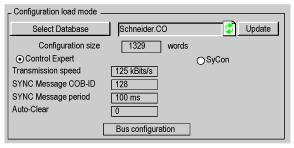
Select the required *.CO file and then click on OK.
Result: if the number of words reserved for inputs and outputs corresponds to the selected configuration, the configuration appears in the Control Expert configuration screen.
 Otherwise the incorrect values appear in red in the configuration screen and it is impossible to go to the bus configuration until these values have been rectified.
When the .CO file passes the maximum capacity for configuration data, an error message appears. You must then use a more powerful Premium processor.
|
|
Step
|
Action
|
|---|---|
|
1
|
Select the type of bus start-up.
|
|
2
|
Click on the Sycon Tool button in order to start the Sycon configuration software.
|
|
3
|
Using the Sycon software, configure your CANopen bus according to the devices planned for the bus.
|
|
4
|
Save the configuration in a file with the .CO extension.
|
|
5
|
Go back to Control Expert.
|
|
6
|
|
|
7
|
Reserve the PLC memory zones to be associated with the inputs and outputs.
|
|
8
|
Select the Control Expert radio button.
|
|
9
|
Click on the Watchdog Enabled button.
|
|
10
|
Confirm the configuration.
Result: the software tells you the number of words needed on input and output to configure the selected bus. If the specified sizes are not the optimum sizes, you can adjust them.
|
