At a Glance
The transfer of an object from the project into the library enables the use of the objects of a project with another project without having to import or export between applications.
Objects transferred to the library can be accessed from all projects.
Transferring an object to the library
Step |
Action |
|---|---|
1 |
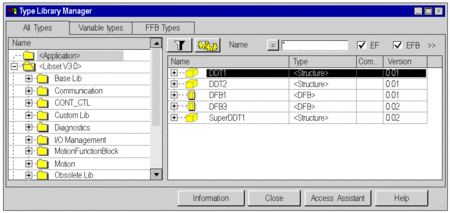
In the menu, select the option. Result: The following window appears.  |
2 |
Select the object of the project to be transferred. |
3 |
Click the right mouse button to open the context menu and select the option. |
4 |
Select the library and target family and click on to confirm your selection. Result: The transfer will be performed automatically. Note: If the transfer is not performed automatically, a help window will be displayed to help you correct the problem. |
Transfer requirements from
If the name of the object in the library ... |
then... |
|---|---|
does not exist, |
the object will be transferred if you have specified the family and the library to which the object is to be transferred. |
exists, but the types are different. |
the transfer will be stopped and not performed, and a message listing the causes will be displayed. Note: To load this object you must rename it and restart the loading process. |
exists and the objects are identical. |
no action is required because the objects are identical. |
exists and only the codes of the objects are different. |
the transfer will only be executed if the version of the object to be transferred matches or is higher than the version of the object that currently exists in the library. Note: The Consistency Check Assistant will ask for a confirmation before executing the transfer. |
exists and only the prototypes of the objects are different. |
the transfer will be stopped and not performed, and a message listing the causes will be displayed. Note: To load this object you must rename it and restart the loading process. |


