Introduction
Each step contains zero or a maximum of 20 actions, see also section Actions in the Reference manual.
The following can be defined for actions:
as action variable, see also section Action variables in the Reference manual
as action section of the programming languages FBD, LD, IL or ST, see also section Action sections in the Reference manual
as Qualifiers, see also section Qualifiers in the Reference manual
the order in which the defined actions should be processed
Defining a new action
Defining a new action:
Step |
Action |
|---|---|
1 |
Open the properties dialog box for the step. Result: The step properties dialog box is opened, see also Steps properties dialog box. |
2 |
Select the tab. Result: The dialog box for defining actions is opened. Example: 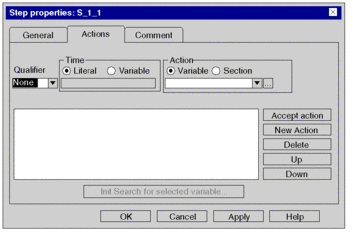 |
3 |
In the area, define an action as |
4 |
If necessary, define an in the Qualifier symbol list box. |
5 |
Confirm the definitions for the action with the button. Result: The action is enabled in the action list box. Example: 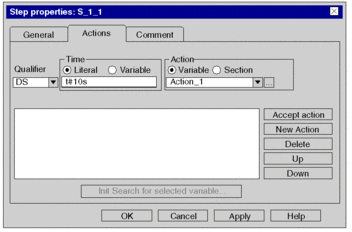 |
6 |
Confirm the entries with . Result: The actions are accepted, the properties dialog box is closed, and a syntax and semantics check is performed. |
Modifying an action
Modifying an action:
Step |
Action |
|---|---|
1 |
Open the properties dialog box for the step. Result: The step properties dialog box is opened, see also Steps properties dialog box. |
2 |
Select the tab. Result: The dialog box for defining actions is opened. |
3 |
Select the action to modify from the actions list box. Result: The properties of the selected action are enabled in the , and areas. Example: 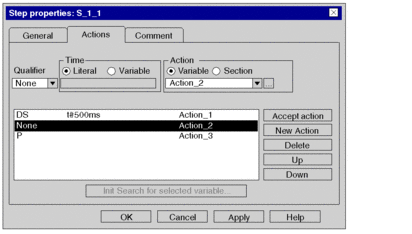 |
4 |
If necessary, modify in the area
|
5 |
If necessary, define an in the Qualifier symbol list box. |
6 |
Confirm the changes for the action with the button. Result: The definitions of the selected action in the action list box are replaced with the changed definitions. |
7 |
Confirm the entries with . Result: The actions are accepted, the properties dialog box is closed, and a syntax and semantics check is performed. |
Defining an action variable
Defining an action variable:
Step |
Action |
|---|---|
1 |
Select the tab from the step properties dialog box, if it isn't already activated. |
2 |
In the area, activate the option button, if it isn't already activated. |
3 |
Enter a Boolean variable/address, or a Boolean element of a multi-element variable in the data selection box, see also section Action variables in the Reference manual. You have the following options to enter variables:
Example: 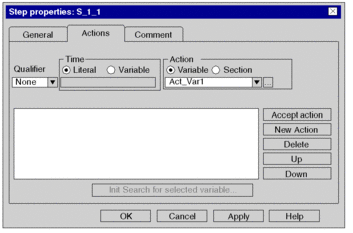 |
4 |
If necessary, define an qualifier for the action. If you do not define an qualifier,
the action section is automatically assigned the qualifier |
5 |
Click the button to insert a new action, or the button to modify an existing action. Result: The action is enabled in the action list box. |
6 |
If the action variable has not
been declared, declare it as |
Defining a new action section
Defining a new action section:
Step |
Action |
|---|---|
1 |
Select the tab from the step properties dialog box, if it isn't already activated. |
2 |
In the area, activate the option button. |
3 |
Enter the name of the action section in the list box, see also section Action sections in the Reference manual. |
4 |
If necessary, define an qualifier for the action section. If you do not define
an qualifier, the action section is automatically assigned the qualifier |
5 |
Click the button to insert a new action, or the button to modify an existing action. Result: The action is enabled in the action list box. Example: 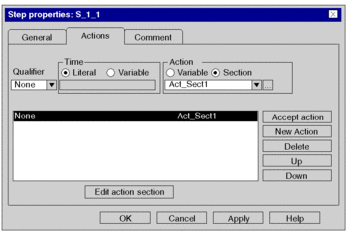 |
6 |
Click the button to create the action section logic. Result: A dialog box is opened for defining the programming language for the action section. Example:  |
7 |
Select the desired programming language for the action section and confirm the selection with . Information for creating LD sections: An LD section contains 11-63 columns and 17-3998 lines. The number of columns is defined using the EditorsNumber of columns. These settings are only valid for new sections and not for existing sections. Always define the number of columns before you create a new LD section. (The number of lines can be increased or reduced during the creation of section contents.) Result: The step properties dialog box is closed and the action section is opened. |
8 |
Create the action section logic, see also section Action sections in the Reference manual. Note: If the action sections subprograms are called in the dialog box, the options and must be activated. Please note that the subroutine called from the action section do not affect the sequence string control, i.e.
|
Defining the qualifier
Defining the qualifier for an action:
Step |
Action |
|---|---|
1 |
Select the tab from the step properties dialog box, if it isn't already activated. |
2 |
Select the desired qualifier from the list box, see also section Qualifiers in the Reference manual. |
3 |
If you select an qualifier of type You can define the time period as a literal
or as a variable of the
|
4 |
Define the action variable or the action section. |
5 |
Click the button to insert a new action, or the button to modify an existing action. Result: The action is enabled with the qualifier in the action list box. Example: 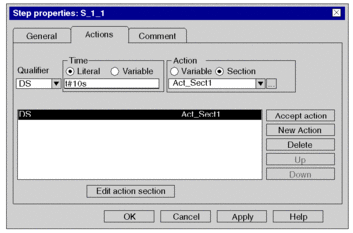 |
Modifying the execution order of actions
Modifying the execution order of actions:
Step |
Action |
|---|---|
1 |
Select the tab from the step properties dialog box, if it isn't already activated. |
2 |
Select the action from the action list box whose execution order you want to change. Note: If several actions are assigned to a step, they are executed in the order they are listed in the action list box. Exception: Regardless of their position in the action list box, actions with
the qualifier |
3 |
Move the selected action to the target position using the and buttons. |
Deleting actions
Deleting actions:
Step |
Action |
|---|---|
1 |
Select the tab from the step properties dialog box, if it isn't already activated. |
2 |
Select the action to be deleted from the actions list box. The following selection options are available:
|
3 |
To delete the selected action(s), click the button. Note: When deleting actions with action sections you are asked to confirm whether the action section should be deleted. Please note that deleted sections CANNOT be restored using . |


 symbol.
 symbol.