

At a Glance
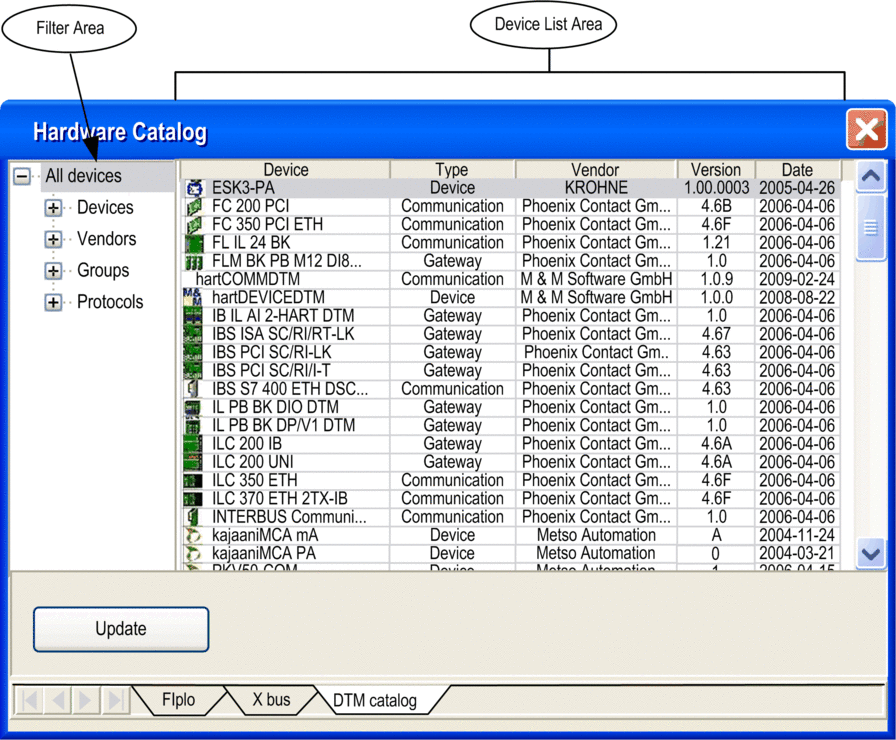
The DTM Hardware Catalog displays all the DTMs installed on the PC.
The DTM tab of the Hardware Catalog is divided into 3 parts:
The Filter area
The Device List Area
The Update button
The DTM Catalog Tab
The following illustration is an example of the DTM Hardware Catalog:
Add DTMs to Connectivity Tree
There are 2 ways to add DTMs to a DTM connectivity tree:
By using the Add device procedure in the DTM Browser
By using the mouse to drag a DTM from the Hardware Catalog and dropping it on an appropriate DTM in the connectivity tree
The Filter Area
The browser in the Filter Area has 4 types of filters with sub-filters. The actual sub-filters available depend on the type of DTMs installed on the PC:
Devices
There are 3 device type sub-filters:
Communication
Gateway or Modular
(Other) Devices
Vendors
Selecting a vendor name displays only the installed DTMs from that vendor.
Groups
Selecting a group type displays only the installed DTMs corresponding to that type of DTM.
Protocols
Selecting a protocol displays only the installed DTMs corresponding to that type of protocol.
When a protocol is selected as the filter, a DTM is only shown if this protocol is required and/or supported by the DTM.
When a filter is selected, only the DTMs corresponding to that filter are displayed in the Device List Area.
The Device List Area
The Device List Area columns give information about each DTM. They are:
Device (name)
Type
Vendor (name)
Version
Date
Clicking on a column heading sorts the DTMs alphabetically according the contents of the column.
DTM Properties
To display the properties of a DTM from the Device List Area:
Step |
Action |
|---|---|
1 |
Click anywhere on the line of the DTM. Result: The DTM is selected. |
2 |
Right-click on the DTM. Result: The Properties menu opens. |
3 |
Use the tabs to see additional information about the DTM: 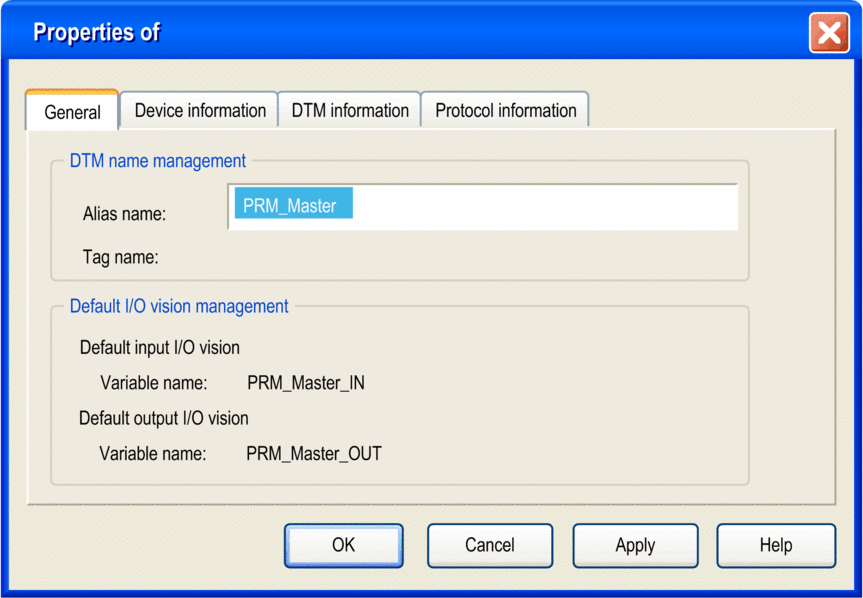 |
4 |
When finished with the window, click on OK or Cancel. |
Update Hardware Catalog
The DTM catalog is fully embedded in the Control Expert software and requires to be up to date whenever a DTM is installed or unistalled. It can be done:
automatically when the Control Expert software is launched in closed project mode
or manually, from the Hardware Catalog window, anytime the customer requests an update.
When the Control Expert software is launched, in closed project mode, and DTMs are installed or uninstalled on/from the PC, the DTM catalog must be updated using the following procedure:
Step |
Action |
|---|---|
1 |
When DTMs are installed or uninstalled and the Control Expert software is launched. Results: The dialog box update opens: 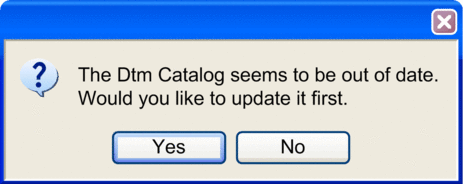 |
2 |
Click on the Yes button. Results: When the update is completed, a message box appears: |
The DTM catalog can be updated manually update can be done using the following procedure:
Step |
Action |
|---|---|
1 |
From the hardware Catalog, click on the Update button. Results: The dialog box update opens: |
2 |
Click on the Yes button. Results: The standard Control Expert progress control dialog is displayed: 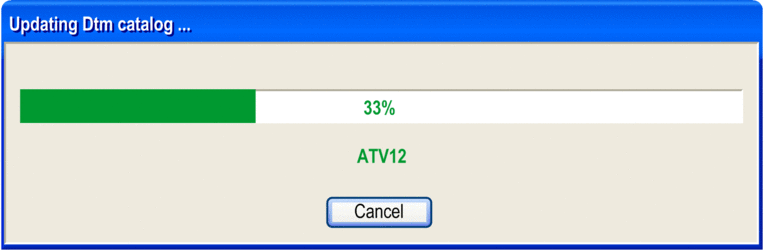 |
Updating the Hardware Catalog does not modify the build status of the DTM. It creates an internal catalog file based on the installed DTMs existing in the Windows® registry.
The time necessary for an update depends on the number for DTMs installed and their sizes.
DTM Version Compatibility
The compatibility of DTM versions is managed by the vendor. They cannot be managed in Control Expert.
During an update no check is made if a DTM missing from the Hardware Catalog is used in an application.
There are 2 methods to check and display any inconsistencies:
Build the whole Control Expert application
Run the Check devices service from the HostPS contextual menu