

Precautions
Forcing input and output values in a running controller can have serious consequences to the operation of a machine or process. Only those who understand the implications in the controlling logic, and who understand the consequences of forced I/O on the machine or process, should attempt to use this function.
| WARNING | |
|---|---|
With Modsoft/NxT/Concept you cannot force outputs when the Memory Protect switch of the Quantum CPU is set to the "On" position.
With Control Expert you can force outputs even when the Memory Protect switch of the Quantum CPU is set to the "On" position.
With Modsoft/NxT/Concept forced outputs maintain their values following a cold start.
With Control Expert forced outputs lose their disabled state following a cold start.
Preset Force Values in Offline Mode
The and for variables can be preset in offline mode via animation tables. This information can be transferred to PLC later.
Presetting values can also be used for multiple modification and forcing of Boolean variables.
Preset Force Values in Project Information
The preset force values of variables are included in the
download () information of a project
upload () information of a project.
The / attribute of a variable is part of the animation table information.
Include in Upload Information
In the properties dialog of an animation table you can activate/deactivate an additional property ().
As a default this property is activated.
This check box in the property dialog of an animation table is enabled only, if is activated via .
Implementing Forcing Mode
Press the button:
This forcing mode is only available for variables responding to these conditions:
The variable is an EBool type.
The forcing attribute is validated in the variable editor.
The variable is a located variable.
The variable is an unlocated variable with the following restrictions:
for Modicon M580 with a firmware version greater or equal to 2.10, the unlocated variable can be in an EDT or in a Device DDT,
for Modicon Quantum 140 CPU 651 50, 140 CPU 651 60, 140 CPU 652 60,140 CPU 658 60, 140 CPU 670 60, 140 CPU 671 60, 140 CPU 672 60, 140 CPU 672 61, 140 CPU 678 61, with a firmware version greater or equal to 3.0 the unlocated variable can only be in a Device DDT (X80 modules in EIO drops).
for Modicon M340 and for Momentum the unlocated variable can not be forced.
NOTE: Forcing/unforcing unlocated variables does not update %SW108.
Analog I/O variables forcing is managed in a different way:
On analog Device DDT, a set of sub fields (for example EIO2_d1_r0_s1_AMI0800.ANA_CH_IN[0].ANA.FORCE_CMD) allows to force analog I/Os with a predefined value.
For Modicon M580 and M340 PLCs the analog I/Os variables can be forced in the program.
Forcing a Variable
To force a located Boolean variable, carry out the following actions:
Step |
Action |
|---|---|
1 |
Use the mouse to select the Boolean variable. |
2 |
Press one of the buttons To force several variables simultaneously, see Forcing several located variables. |
 corresponding to the desired
value, or from the contextual menu, execute the
corresponding to the desired
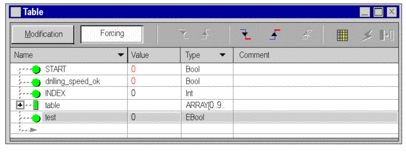
value, or from the contextual menu, execute the When a variable is forced, the letter F is displayed in front of the value:

Unforcing a Variable
To unforce a located Boolean variable, carry out the following actions:
Step |
Action |
|---|---|
1 |
Use the mouse to select the Boolean variable. |
2 |
Press the To unforce several variables simultaneously, see Unforcing several located variables |
 . button or execute the
 When a variable is unforced, the letter F no longer appears in front of the value.
Creating an Offline Forcing Animation Table
To create a new animation table of forced bits from scratch, carry out the following actions:
Step |
Action |
|---|---|
1 |
Create a new (permanent) animation table via the . |
2 |
Enter the memory bits you want to force either as single bits (like %M1) or as a bit array (like M1:100). |
3 |
Press the button. |
4 |
Press the |
5 |
Enter forcing values or in the column. |
 button.
To create a new animation table of existing forced bits in the PLC, carry out the following actions:
Step |
Action |
|---|---|
1 |
There are 3 ways to open the animation table:
|
2 |
Since this animation table is temporary only, copy and paste the animation table via context menu of the . |
3 |
Make the copied animation table
permanent (using the button |
4 |
In the animation table press the button. |
5 |
Press the |
6 |
Press the Result: The column is populated. |
 ).
). button.
and your application.
By building, the values entered in the column will be included in the upload information which is downloaded into the PLC.
Forcing by Use of an Offline Forcing Animation Table
To force values before starting the PLC, carry out the following actions:
Step |
Action |
|---|---|
1 |
Open an existing application (*.STU, *.STA or an uploaded application). |
2 |
Connect to the PLC. |
3 |
Open the manually created/copied animation table (see Creating an Offline Forcing Animation Table). |
4 |
Press the button to enter forcing mode. |
5 |
Press the |
6 |
Press the |
7 |
Now you can start your application. |
 button to force the bits
from the preset
button to force the bits
from the preset