|
Mounting and Removing a Terminal Strip
|
|


|
Original instructions
|
|
Mounting and Removing a Terminal Strip
|
|
|
Original instructions
|
|
Step
|
Action
|
|---|---|
|
1
|
Install the appropriate Terminal Strip on the module.
Side view:
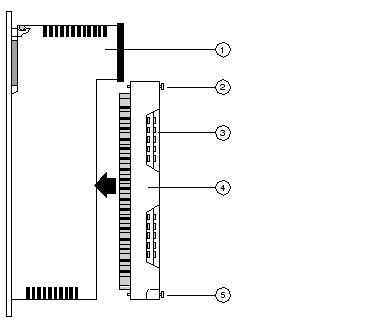 1Module 2Mounting screw (top) 3Terminal Strip I/O screws 4Terminal Strip 5Mounting screw (bottom) |
|
2
|
Tighten with the mounting screws at the top and bottom of the terminal with a philips screwdriver.
Note: The tightening torque must be between 0.5 Nm and 0.8 Nm.
|
|
3
|
Make I/O connections with a philips screwdriver as shown in the individual Quantum module wiring diagrams.
Note: The tightening torque must be between 0.5 Nm and 0.8 Nm.
|
|
NOTICE
|
|
DESTRUCTION OF ADAPTER
Failure to follow these instructions can result in equipment damage.
|
|
Step
|
Action
|
|---|---|
|
1
|
Loosen the Terminal Strip mounting screws located at the top and bottom of the Terminal Strip.
|
|
2
|
Locate the pry slot at the top of the Terminal Strip near the top mounting screw.
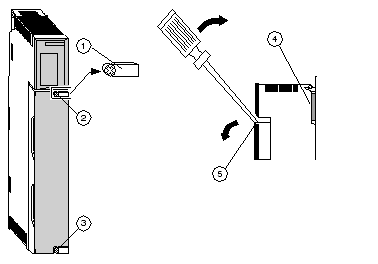 1Pry Slot (exploded view) 2Mounting screw (top) 3Mounting screw (bottom) 4Rack 5Pry Slot (side view) |
|
3
|
Insert a flat edge screwdriver into the pry slot and lever the top of the Terminal Strip away from the module.
|
|
4
|
Once the top of the Terminal Strip has been loosened, the terminal strip may be removed by continuous outward pressure with the screwdriver.
|
