|
Configuring the Rack with Control Expert
|
|


|
Original instructions
|
|
Configuring the Rack with Control Expert
|
|
|
Original instructions
|
|
Step
|
Action
|
|---|---|
|
1
|
Click Start.
|
|
2
|
Select Programs.
|
|
3
|
Then select Schneider Electric → Unity Pro → Unity Pro XL.
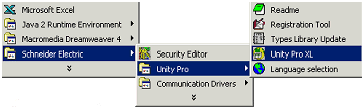 Note: The name of your Unity Pro package may be different. It may be Unity Pro M, Unity Pro L, Unity Pro XL, etc.
|
|
4
|
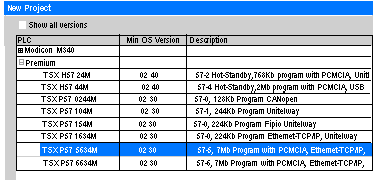
Select New in the File menu to create a New Project dialog box.
|
|
5
|
In the New Project dialog box, expand the Premium family to select the installed processor.
 |
|
6
|
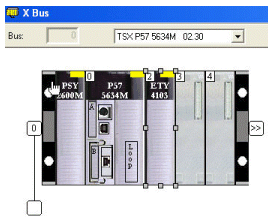
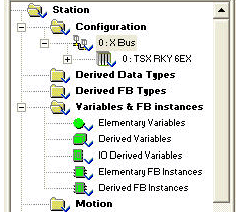
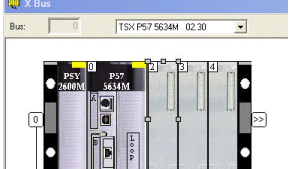
In the project browser, double-click Station/Configuration/XBus to access the configuration of the local rack.
 |
|
7
|
Double-click slot 2 to bring up the New Device dialog box ( see step 8).
 |
|
8
|
Double-click the module that goes in slot 2 (TSX ETY 4103 in our example).
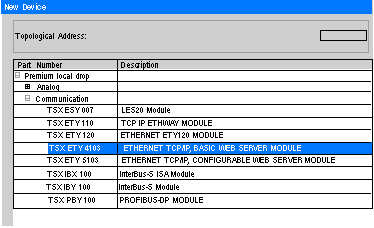 Note: Alternately, you can click the module and drag it to the selected slot on the rack.
|
|
9
|
Repeat step 8 for each module included in your configuration.
|