|
Adding the Module to an Ethernet Network
|
|


|
Original instructions
|
|
Adding the Module to an Ethernet Network
|
|
|
Original instructions
|
|
Step
|
Action
|
Result
|
|---|---|---|
|
1
|
Open the hardware configuration editor.
|
|
|
2
|
Double-click the empty slot in which you wish to place the module.
|
The New Device window appears.
|
|
3
|
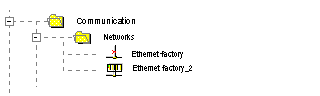
Expand (+) the Communication family.
|
|
|
4
|
Left-click to select the desired Ethernet module from the list of Communication family modules.
|
|
|
5
|
Press OK.
|
The module appears in the rack (see note).
|
|
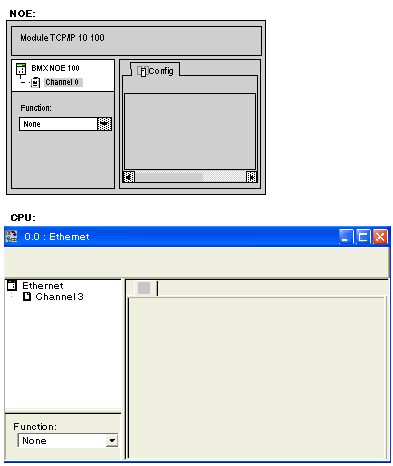
Note: In the case of Ethernet solutions integrated in the processors, the Ethernet communication channel is automatically declared when a processor is chosen:
|
||
|
Step
|
Action
|
|---|---|
|
1
|
Open the hardware configuration editor.
|
|
2
|
Double-click the module.
 |
|
3
|
In the Function menu, scroll to a network to associate with the module. Then, in the Net link menu, scroll to the logic network you wish to associate with the Ethernet channel of the module.
 |
|
4
|
Confirm your choice and close the window. The Ethernet factory_2 logic network is associated with the Ethernet BMX NOE 0100 module. The module address is written in the logic network's configuration window. The icon associated with this logic network changes and indicates the links with a PLC.
 |
