|
Configuration Methodology for an Ethernet Network
|
|


|
Original instructions
|
|
Configuration Methodology for an Ethernet Network
|
|
|
Original instructions
|
|
Step
|
Action
|
|---|---|
|
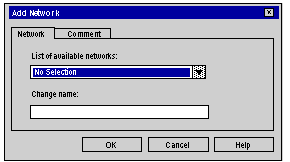
1
|
In the Project Browser, right-click the Network subdirectory in the Communication directory and select the New Network option. The Add Network screen appears:
 |
|
2
|
Choose Ethernet in the List of available networks and choose a meaningful name for your selection:
 Note: If desired, a comment may be added by clicking on the Comment tab.
|
|
3
|
Click OK, and a new logic network is created. The new Ethernet network appears in the project browser:
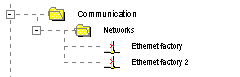 Note: As you can see, a small icon indicates that the logical network is not associated with a PLC device.
|
|
Step
|
Action
|
|---|---|
|
1
|
Open the project browser in order to see the logic networks of your application:
 |
|
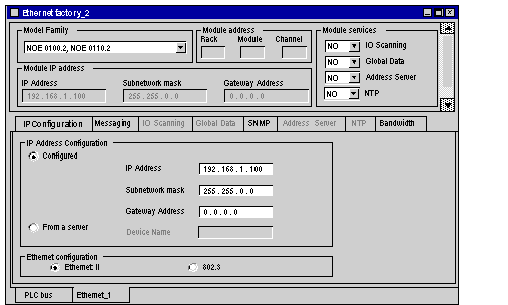
2
|
Right-click the Ethernet logic network to be configured and select Open. The Ethernet configuration screen is displayed.
 |
|
3
|
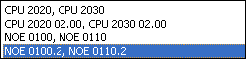
Scroll to choose the Model Family of your network:
 |
