|
Working With Data Templates
|
|
|
Original instructions
|
|
Step
|
Description
|
|---|---|
|
1
|
Confirm that Data Editor animation is OFF. If necessary, click the Stop animation
 toolbar button. toolbar button. |
|
2
|
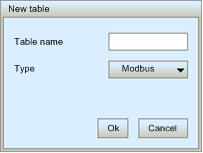
Click the New table
 toolbar button. toolbar button. The New table dialog opens:
 |
|
3
|
In the Table name field, type in the name of the new data template.
|
|
4
|
Click Ok.
The new data template appears as a node in the data template list.
|
|
Step
|
Description
|
|---|---|
|
1
|
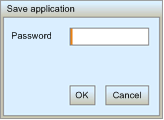
Click the Save
 toolbar button. toolbar button. The Save application dialog opens:
 |
|
2
|
In the Password field, type in the Web Page (HTTP) Access password.
NOTE: The default password is USER. |
|
3
|
Click Ok.
The new data template is saved.
|

|
Step
|
Description
|
|---|---|
|
1
|
In the data template spreadsheet, double-click on an empty row.
The Data Editor configuration area opens.
|
|
2
|
In the Address field of the configuration area, type in the item’s direct address.
|
|
3
|
In the configuration area, click Apply. The selected row is updated.
|
|
4
|
Save your edits.
|
|
Step
|
Description
|
|---|---|
|
1
|
In the data template spreadsheet, double-click on the item you want to write data to.
The Data Editor configuration area opens, displaying the fields for the selected item.
|
|
2
|
In the Value field, type in the desired data value.
|
|
3
|
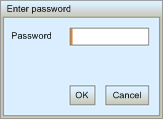
Click Apply.
The Enter password dialog opens:
 |
|
4
|
In the Password field, type in the Write Data password.
NOTE: The default password is USER. |
|
5
|
Click OK. The new value is sent to the controller.
|