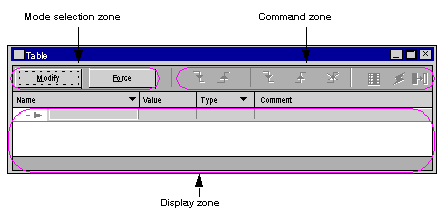
Using Data via the Animation Tables
(Original Document)
At a Glance
The animation table is the Control Expert’ basic tool for viewing and forcing the status of variables.
NOTE: Control Expert also offers a graphic tool called Operator Screens which is designed to facilitate use of the application.
An animation table is divided into 3 areas that include:
Animation table:
Creating an Animation Table
The table below presents the procedure for creating an animation table:
Step
Action
1
Right-click on the Animation Tables directory in the project browser.
Result: the contextual menu is displayed.
2
Select New Animation Table.
Result: a table properties window is displayed.
3
Click on OK to create the table, which is given a default name.
Result: the animation table is displayed.
Adding Data to the Animation Table
The table below presents the procedure for creating data to view or force in the animation table:
Step
Action
1
In the Table window, click on the empty line in the Name column.
2
There are two possible ways of adding data:
  • Enter the variable directly
  • Click on the icon to display the instance selection window in order to select the variable
3
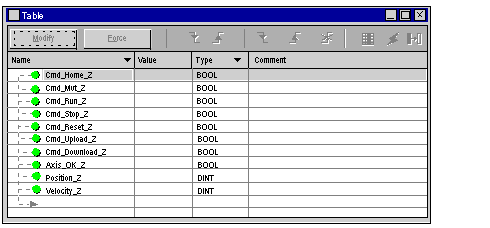
Enter or select the respective variables.
  • Cmd_Home_Z to issue an return axis to home position command
  • Cmd_Mvt_Z to issue a move axis command
  • Cmd_Run_Z to issue a run axis command
  • Cmd_Stop_Z to issue a stop axis command
  • Cmd_Reset_Z to issue an axis acknowledgement command
  • Cmd_Upload_Z to issue a save axis data to a recipe table command
  • Cmd_Download_Z to issue a transfer data from the recipe table to the axis command
  • Axis_OK_Z to view the axis recognized by the CANopen bus
  • Position_Z to determine the value of the axis position
  • Velocity_Z to determine the value of the axis speed
Result: the animation table looks like this.