|
140 CRA 312 00, BME CRA 312 10, and BMX CRA 312 x0 Firmware Update
|
|
|
|
|
NOTICE
|
|
EQUIPMENT DAMAGE
During the download:
Failure to follow these instructions can result in equipment damage.
|
|
Step
|
Action
|
|---|---|
|
1
|
Disable the antivirus and firewall of your computer and enable them again once the module is updated.
|
|
2
|
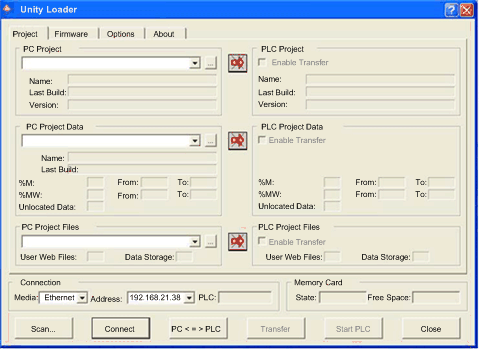
Open Unity Loader on your PC. (Start → Programs → Schneider Electric → Unity Loader)
Unity Loader opens and displays the Project tab:
 |
|
3
|
In the Connection area of the Project tab:
|
|
4
|
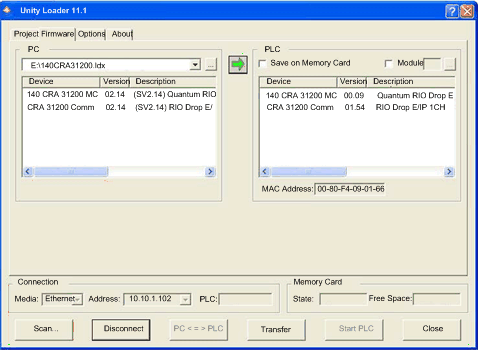
When Unity Loader is connected to the module, select the Firmware tab.
|
|
5
|
In the PC area, click the ellipsis (...) button to open a dialog where you can navigate and select the firmware file for the network connectivity module. The firmware is contained in a Unity Loader file (.ldx extension).
When the firmware file is selected, the selected revision of this firmware is displayed in the list on the left and the current version of the firmware is displayed in the list on the right.
 |
|
6
|
When the arrow in the middle of the screen (above) is green, click Transfer.
NOTE: Only click Transfer if the arrow is green. A yellow arrow indicates that the firmware file on your computer is different than the remote I/O adapter. A red arrow indicates that the firmware on the computer is not compatible with the remote I/O adapter. |
|
7
|
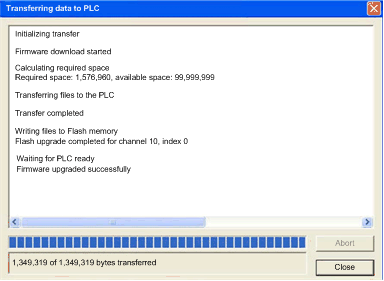
Click yes on the 2 dialogs that appear. A third dialog appears (below), which indicates the transfer status with the blue bars at the bottom of the screen. When the transfer is completed, click Close.
 |
|
8
|
In Unity Loader software, click Disconnect and close the window.
|