Overview
Use these procedures to upgrade the firmware for the 140CRA31200 or BMXCRA312•0 remote I/O adapter:
Stage |
Description |
|---|---|
1 |
Download and install Unity Loader software. |
2 |
Configure and store IP parameters (optional). |
3 |
Connect your configuration PC to the remote I/O adapter. |
4 |
Transfer the firmware upgrade to the remote I/O adapter. |
The minimum required version of Unity Loader is V2.2. (V2.3 is required for the BMXCRA312•0 adapter module and I/O modules in a Modicon X80 Ethernet remote I/O drop.)
Downloading and Installing Unity Loader
Download the Unity Loader software to your PC:
Step |
Action |
|---|---|
1 |
Enter the web address for Schneider Electric (www.se.com) in an Internet browser. |
2 |
In the , enter the phrase and press |
3 |
Examine the search results and select the appropriate entry for the Unity Loader software. NOTE: You can select the menu command to filter
the results.
|
4 |
Follow the on-screen instructions to download both the Unity Loader installation software and any necessary installation instructions. |
5 |
Run the Unity Loader setup file and follow the instructions (on the screen and in the downloaded documentation) to install Unity Loader. |
Default Address Configurations
If you wish, you can configure and store IP parameters for the remote drop’s communications adapter when these conditions are met:
The rotary switch setting is Stored.
You have not configured and stored valid IP parameters
The adapter uses these default address configurations:
Parameter |
Description |
|---|---|
Default IP Address |
The default IP address starts with 10.10 and uses the last 2 bytes of the MAC address. As an example, a device with the MAC address of 00:00:54:10:8A:05 has a default IP address of 10.10.138.5 (0x8A=138, 0x05=5). |
Default Sub-Network Mask |
The default mask is 255.0.0.0 (a class A mask). |
Default Gateway Address |
The default gateway address is identical to the default IP address. |
The default address is based on the adapter’s MAC address. This makes it possible for several Schneider Electric devices to use their default network configurations on the same network.
To use a specific set of IP parameters, store them in the adapter module. Set the rotary switches to the Stored position.
You can send an EtherNet/IP explicit message to the TCP/IP interface object of the module to store the configured IP parameters.
Connect the Configuration PC to the Remote I/O Adapter
Connect your configuration PC (that is running Unity Loader) directly to the 140CRA31200 or BMXCRA31210 adapter module. These ports are available:
SERVICE port
DRS port that is configured for a distributed I/O cloud
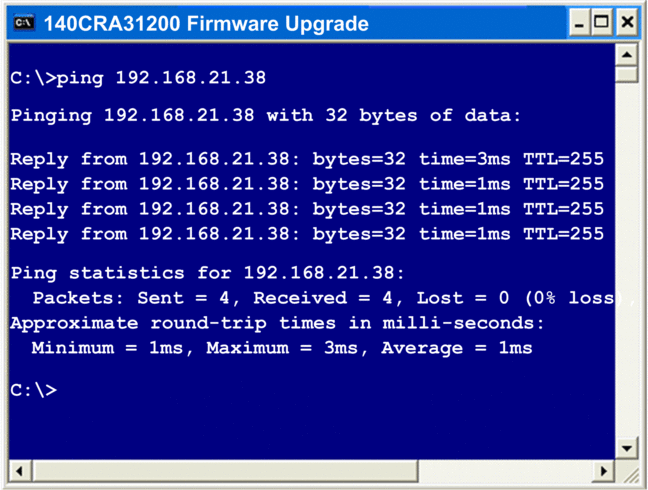
Verify that communications are established between the PC and the adapter by issuing a Ping command from the PC:
Step |
Action |
Comment |
|---|---|---|
1 |
Open a command window on the PC. |
. |
2 |
In the dialog, type in . |
|
3 |
Click . |
|
4 |
At the command prompt, type in the ping command and the device IP address. |
Example: |
The command window verifies that a connection is established:

Upgrade Procedure
Do not interrupt the firmware download process:
Do not allow an interruption to the power or the communications during the firmware upgrade process.
Do not shut down the Unity Loader software during the upgrade.
If the firmware download process is interrupted, the new firmware is not installed and the adapter continues to use the old firmware. If an interruption occurs, restart the process.
Open Unity Loader on your PC and update the firmware for the remote I/O adapter:
Step |
Action |
|---|---|
1 |
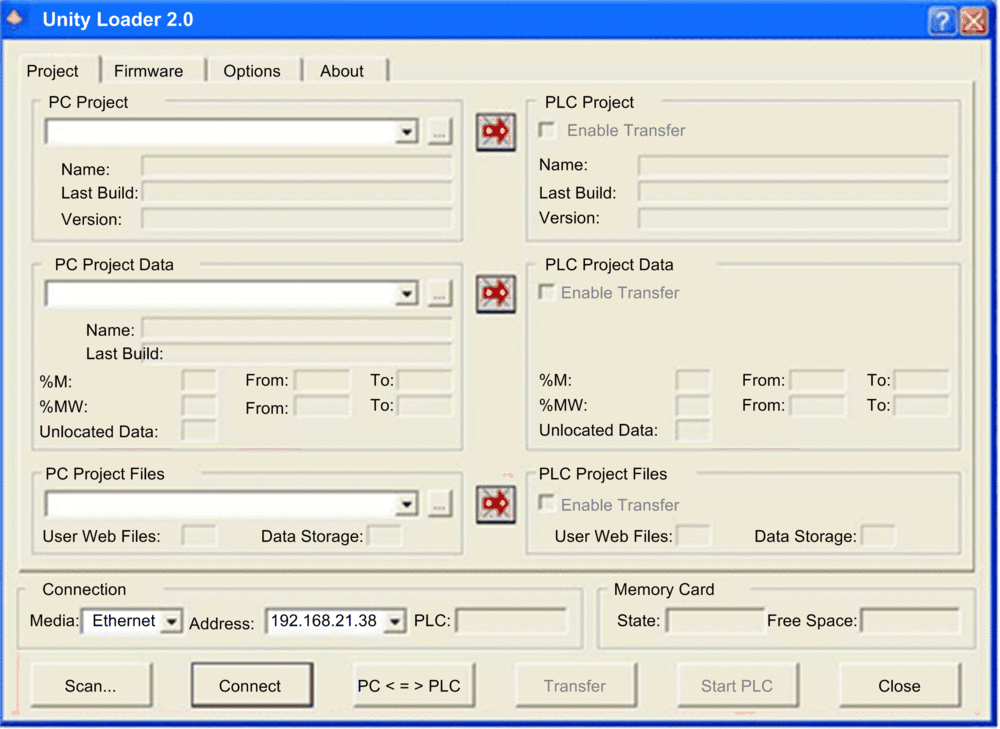
Open Unity Loader on your PC. () Unity Loader opens and displays the tabM  |
2 |
In the area of the page, connect to the module:
|
3 |
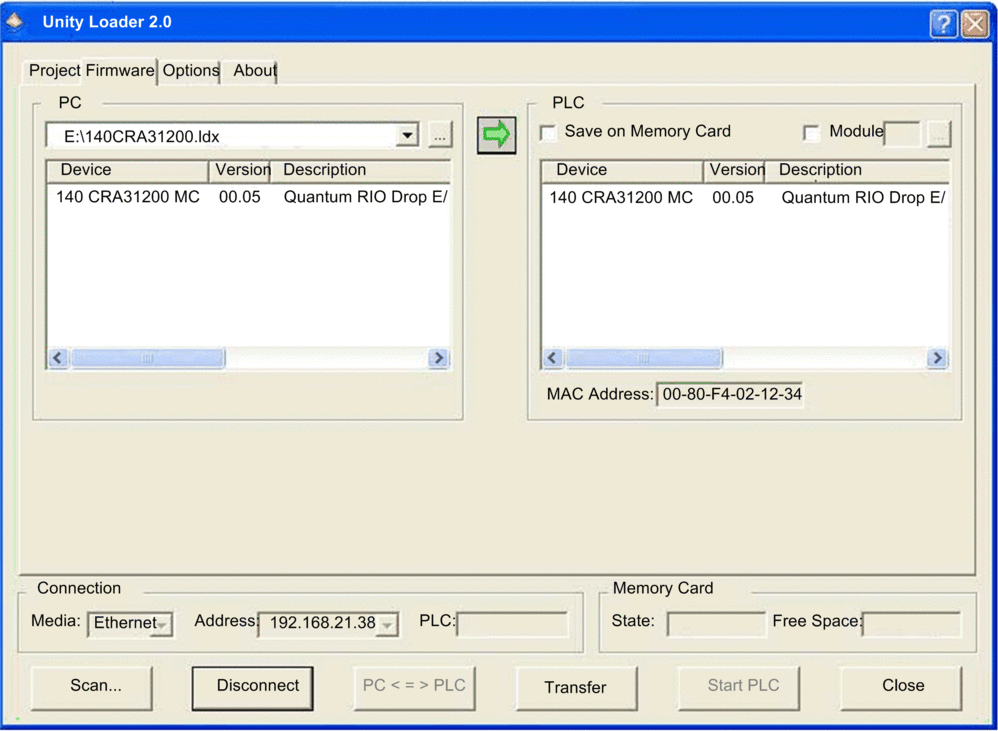
After Unity Loader has connected to the module, click the tab: |
4 |
In the area, click the ellipsis () button to open a dialog where you can navigate to and select the firmware file for the network connectivity module. The firmware is contained in a Unity Loader file (.ldx extension). After you select the firmware file and close the dialog, the selected revision of this firmware is displayed in the list on the left, and the current version of the firmware is displayed in the list on the right.  |
5 |
When the arrow in the middle of the screen (above) is green, click . NOTE: Only click if the arrow is green. A yellow
arrow indicates that the firmware file on your computer is the same
version or newer than the file selected for transfer; a red arrow
indicates that the firmware on the computer is not compatible with
the remote I/O adapter.
|
6 |
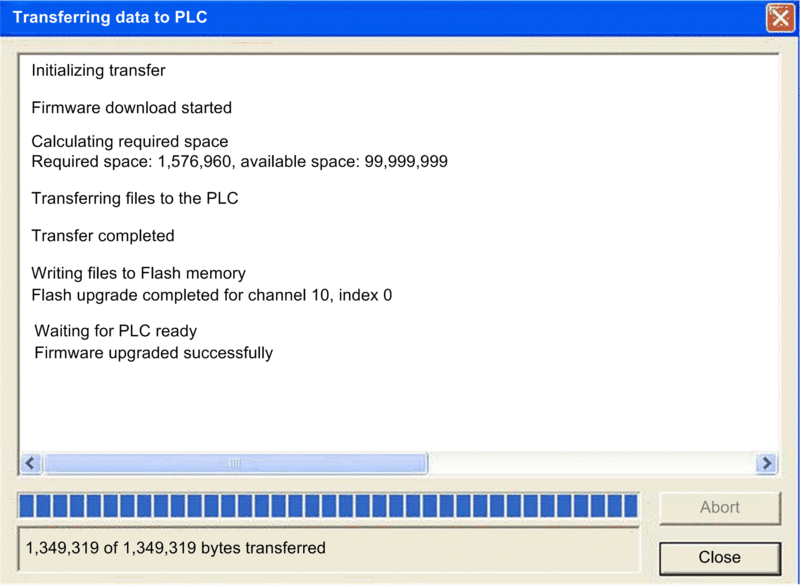
Click on the 2 dialogs that appear. A third dialog appears (below), which indicates the transfer status with the blue bars at the bottom of the screen. After the transfer is complete, click .  NOTE: If you are upgrading firmware for more than
one remote I/O adapter, additional dialogs will appear. Click to close each dialog.
|
7 |
In the Unity Loader software, click and close the window. |
8 |
Reboot the module to finalize the firmware update. |
The upgrade process takes approximately 2 minutes:
firmware upgrade (1 minute)
reboot, reestablish I/O connections (1 minute)
During the firmware upgrade, the I/O communications with the adapter module may be interrupted. After the Hold up time expires, the I/O modules return to their fallback state.


