Introduction
For placing coils the following restrictions apply:
Only 1 coil can be placed per row.
No other object can be placed to the right of a coil. The coil is always the last object in a row.
If a coil is placed in a cell that is already occupied by another object (e.g. FFBs), an error message is returned.
A placed coil automatically creates a connection with its
neighboring objects on the left if they are of the BOOL data type, even if free cells are between them.
The following are permitted as actual parameters for coils:
Boolean variables
Boolean addresses (topological addresses or symbolic addresses)
Show Coils in Last Column
Using the main menu you can activate the setting.
If this setting is activated, each coil will be displayed in the last column with a dotted line between its "real" location cell and the last column.
Otherwise each coil will be displayed at its "real" location cell.
Automatically Assign a Variable
If via the check box is activated, then the corresponding properties dialog is automatically opened when an object is placed. The procedures explained here are used when the check box is deactivated.
Placing Coils
Step |
Action |
|---|---|
1 |
Select the desired coil. See also Selecting Coils. |
2 |
Click the target cell in the LL984 section. or Use the keys to move the gray field to the target position, and press . Result: The selected coil is inserted. |
3 |
To place further coils of the same type:
|
Assigning Actual Parameters
Step |
Action |
|---|---|
1 |
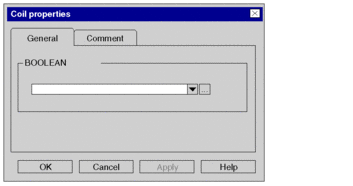
Open the properties dialog for the coil. Result: The coils properties dialog is opened. Example:  |
2 |
You have the following options to enter the actual parameters:
|
3 |
Confirm the selected variable with . Result:
|
4 |
If you do not want to assign the
variable an address or comment, confirm using or the Result: The variable is declared and enabled in the section. A syntax and semantics check is performed and the procedure ends here. |
5 |
If you do want to assign the variable
an address and/or comment, use the  |
6 |
Confirm with or the Result: The variable is declared and enabled in the section. A syntax and semantics check is performed. |


 symbol and confirm using

 symbol.
 symbol for obtaining an advanced dialog and
enter the address and/or comment.
 symbol.