At a Glance
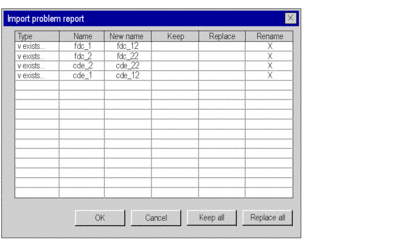
When importing an element with the same name, if it already exists in the project, an Import problem report dialog box lets you choose from several operating modes:
Keep,
Replace,
Rename.
These operating modes depend on the element to be imported. Excluding the global project import function, all the other elements have these operating modes.
The following example shows the dialog box with conflicts when importing variables:

How to Manage Conflicts
You should perform the following steps in order to import an element and manage conflicts during the import process:
Step |
Action |
|---|---|
1 |
In the project browser, select the element to be imported. Result: the element selected appears in reverse video. |
2 |
Activate the Import command from the File menu or from the contextual menu (by clicking the right mouse button). Result: a dialog box appears on the screen: |
3 |
Choose the source folder for the import (directory tree) then select the file to be imported. For the Variables element, the file type can be modified (XSY or TXT). Result: the name of the file then appears in the File name field. |
4 |
Activate the Import command. Result: if there is no conflict, a progress indicator appears during the import, otherwise the Import problem report dialog box appears on the screen. |
5 |
If you do not want to import the elements, check the Keep mode. |
6 |
If you want to replace the elements with the imported ones, check the Replace mode. For further information on the replacement of Function Block (FB) instances see Changing the type of an instance. |
7 |
If you want to rename the elements, check the Rename mode. Result: a dialog box appears on the screen where you can enter the name for the element to be modified.  |
8 |
Start the import with your chosen option (Keep, Replace, Rename) using the OK command. If a conflict still exists, the Import problem report appears on the screen. Repeat steps 5, 6 and 7. If you want to cancel the import, activate the Cancel command. |


