

Configuration Sequence
The following table presents the sequence to follow in order to configure the system time stamping in Control Expert:
Step |
Action |
|---|---|
1 |
Set Control Expert project settings. |
2 |
Create an application in Control Expert with time stamping modules. Select the appropriate time stamping modules. |
3 |
Set the time stamping module time sources parameters. |
4 |
Select the events to time stamp. |
5 |
Set the time stamped event parameters. Time stamping module buffer parameters are preset. |
Project Settings
In Control Expert software, to allow system time stamping, adjust the by clicking .
Data Dictionary Configuration
Click and select the check box. This setting allows any client (SCADA using OFS) to animate and modify all symbolized variables of the application embedded in the PLC memory without needing to synchronize it again with Control Expert application or with.XVM export file generated by Control Expert. It also allows to make OFS variables consistent with PLC application.
The table is necessary because time stamped events are mapped on symbolized variables.
Time Stamping Parameters
Click to reach time stamping parameter:
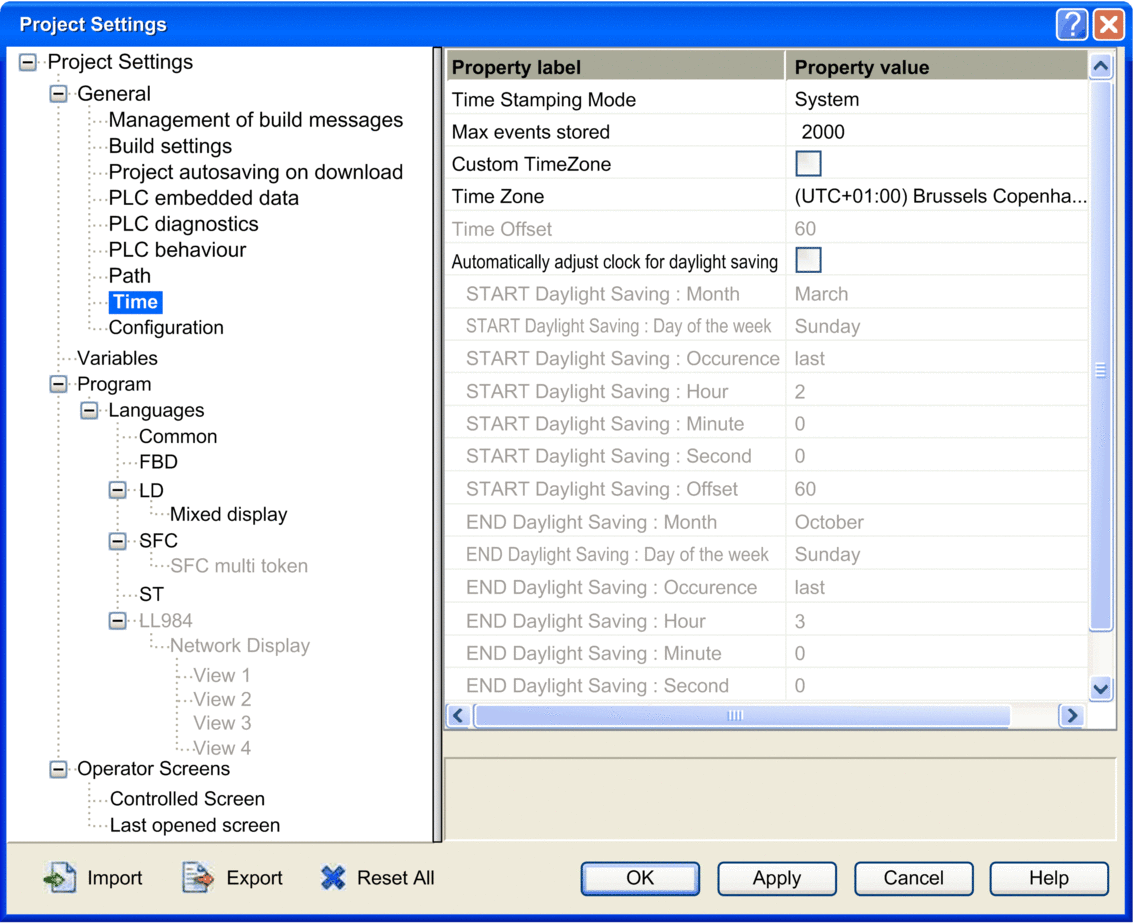
In field, set the time stamping mode and time zone:
Subfield |
Value for System Time Stamping |
Description |
|---|---|---|
|
System |
Select to enable system time stamping. |
|
See description. |
Only available for Time Stamping, this value (between 0 and 32000) defines the maximum number of time stamping events that can be stored in the PLC global event buffer. See the to know the memory size used and refine this value if needed. Default value (minimum) = 2 * number of events configured * 100 / (100 - buffer full threshold), where:
NOTE: When building the project, if this value is
too small a message gives the exact value to select.
|
|
Enabled or Disabled |
Gives the possibility to define your own time zone. If checked the option:
|
|
(1.) |
Can be selected if is disabled only. Allows you to select the wanted time zone in the list of standard time zone. |
|
(1.) |
Can be selected if is enabled only. Allows you to add an offset to the current local time between -1439...1439 minutes. |
Automatically adjust clock for daylight saving |
(1.) |
Can be selected if is enabled only. : In the and fields, enter the month, day of the week, occurrence range, hour, minute, second, and offset from the respective dropdown lists. (by default): The and fields are disabled because their times are automatically changed in the spring and fall every year. NOTE: Automatic
clock adjust for daylight saving change is not implemented on Modicon
Premium range. You are advised not to activate this useless feature
(No internal or external action is performed when this function is
activated).
|
(1.) |
|
|
(1.) |
|
|
1. No specific value required for system time stamping, depends on Custom TimeZone subfield value. |
||
Time stamped events are marked in UTC values and the time zone settings allow to convert GPS local time to UTC values in BMX ERT 1604 T.