This section contains guidelines for installation and drawings which illustrate how to mount a TSX Momentum assembly on a DIN rail or wall.
TSX Momentum components are designed as open equipment per IEC 1131-2, 1.4.20. Open equipment should be installed in industry-standard enclosures, and access should be restricted to authorized personnel.
Contact springs on the back of the I/O base establish electrical contact (chassis ground) with the DIN rail mounting track.
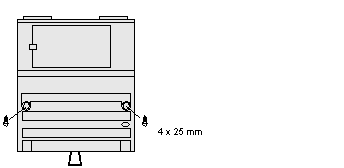
To establish chassis ground in a wall-mount situation, you will need to obtain two mounting screws for each unit. The body of the screws should be 4mm (0.16 in) in diameter and at least 25mm (0.97 in) long. The head of the screw must not exceed 8mm (0.31 in) in diameter.
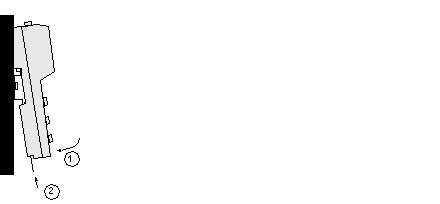
The numbers in the following illustration refer to the steps in the procedure below.
Follow the steps in the table below to mount a TSX Momentum assembly on a DIN rail.
|
Step
|
Action
|
|
1
|
Hook the plastic tabs on the back of the device onto the DIN rail and swing the module down to rest against the rail.
|
|
2
|
Push the locking tab upward to secure the device in place.
|
Secure the device to the wall with two screws, as shown in the illustration below. The head of the screws must not exceed 8mm (0.31 in) in diameter.

