|
Disassembling a Module with an Option Adapter
|
|


|
Original instructions
|
|
Disassembling a Module with an Option Adapter
|
|
|
Original instructions
|
|
Step
|
Action
|
|---|---|
|
1
|
Make sure that the power is off by removing the terminal connectors from the I/O base.
|
|
2
|
Remove the assembled unit from its wall or DIN rail mounting surface.
|
|
NOTICE
|
|
RISK OF DETERIORATION OF CIRCUITRY IN BATTERY COMPARTMENT
Use care when you insert a screwdriver in the battery compartment so that you do not scratch any exposed elements.
Failure to follow these instructions can result in equipment damage.
|
|
Step
|
Action
|
|---|---|
|
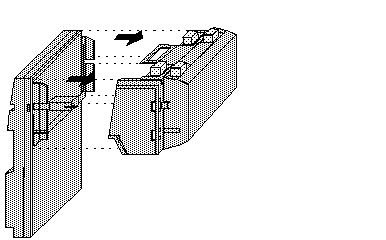
3
|
Open the battery door and use a flat-head screwdriver to release snaps 1 and 2 as shown in the illustration below.
 |
|
4
|
Once snaps 1 and 2 have been disengaged, use the screwdriver to release snaps 3 and 4 on the front of the assembly.
|
|
5
|
Gently lift the stirrup on the back of the option adapter with your fingers until it disengages from the bottom of the I/O base. Then lift the option adapter and M1 assembly from the I/O base.
 |
|
6
|
Follow the directions in the next procedure to remove the option adapter from the Processor.
|
|
Step
|
Action
|
|---|---|
|
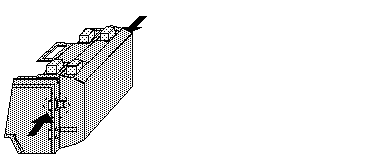
1
|
Use a screwdriver to push the clips on both sides of the adapter inward.
 |
|
2
|
Lift off the adapter.
|
