|
Assembling a Processor Adapter onto an I/O Base
|
|


|
|
|
Assembling a Processor Adapter onto an I/O Base
|
|
|
|
 CAUTION CAUTION |
|
ADAPTER MAY BE DAMAGED BY STATIC ELECTRICITY
The adapter's electrical elements are sensitive to static electricity.
Failure to follow these instructions can result in injury or equipment damage.
|
 DANGER DANGER |
|
RISK OF ELECTRICAL SHOCK
Electrical circuitry on the I/O base may be exposed when a Momentum adapter is not mounted.
Failure to follow these instructions will result in death or serious injury.
|
|
Step
|
Action
|
|---|---|
|
1
|
Choose a clean environment to assemble the I/O base and adapter to protect the circuitry from contamination.
|
|
2
|
Make sure that the I/O base is not under power when you assemble the module.
|
|
3
|
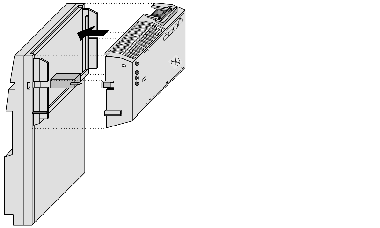
Align the two plastic snap extensions on the adapter with the slots on the sides of the I/O base. The 12-pin connectors will automatically line up when the units are in this position. The two devices should be oriented so their communication ports are facing out, on the back side of the assembly.
 |
|
4
|
Push the adapter onto the base, gently pressing the locking tabs inward.
Result: The locking tabs on each side of the adapter slide inside the I/O base and out through the locking slot. The 12-pin connectors on the two units are mated to each other in the process.
 |
|
5
|
Attach the grounding screw.
|
|
6
|
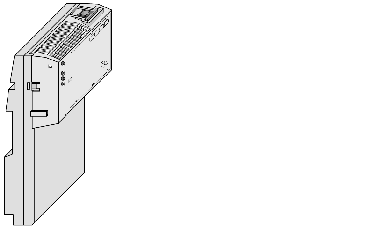
Once the adapter has been assembled and snapped onto a base and the grounding screw secured, the entire assembly can be mounted on a DIN rail or panel. The device meets CE mark requirements for open equipment. Open equipment should be installed in an industry-standard enclosure, and direct access must be restricted to qualified service personnel.
|
