Setting Rotary Switches
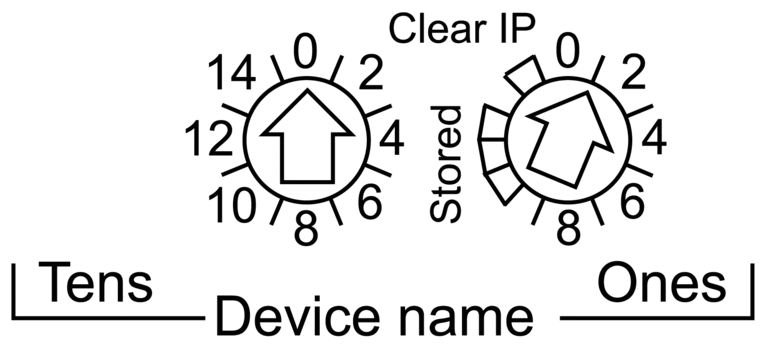
Set the location of the remote I/O drop on the network with the rotary switches on the front of the adapter module:

The values you set are applied during a power cycle. If you change the switch settings after the module has powered up, the Module Status LED is activated and a mismatch message is logged in the module diagnostic.
If you want to return to the original setting of a modified rotary switch (and the other switch was changed), turn the switch until the Module Status LED goes from red to green.
New values on the rotary switches are implemented at the next power cycle. Set the value before starting the module (valid values: 00 ... 159).
The values on the rotary switches combine with the device prefix (for example, BMECRA_xxx or BMXCRA_xxx) to create the device name (where xxx represents the value of the rotary switches). The preceding figure shows the Tens switch set to 00 and the Ones switch set to 1, for a device name of BMECRA_001.
NOTES:
The rotary switches can be manipulated with a small flat-tipped screwdriver.
No software is required to configure or enable the rotary switches.
Do not use the Stored and Clear IP settings on the Ones rotary switch as they do not apply to remote I/O installations.


