|
Module B882–032 24Vdc Diagnostic Output, Quick Start Test
|
|


|
(Original Document)
|
|
Module B882–032 24Vdc Diagnostic Output, Quick Start Test
|
|
|
(Original Document)
|
|
Step
|
Procedure
|
|---|---|
|
1
|
Set the 4 position dip-switch as follows: (viewing the rear of the module when held vertically):
SW1 and SW2 Left Not Used (keep to left
SW3 Right Selects B882 (bi-directional)
SW4 Left Not Used (keep to left)
|
|
2
|
Determine which channel and slot location is being used for this module.
|
|
3
|
Wire terminals 5,15, 25, 35 to a +24 Vdc supply, and wire terminals 6,16, 26, 36 to a -24 Vdc Supply on a AS -8535 -000 high density connector.
|
|
Step
|
Procedure
|
|---|---|
|
4
|
Stop the PLC.
|
|
5
|
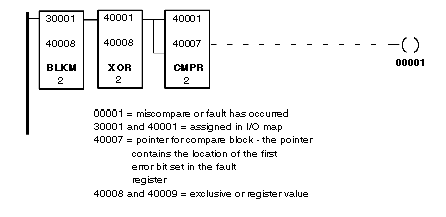
I/O map the module as a B882, registers 30001/30002, 40001/40002 binary.
|
|
6
|
Start the PLC.
|
|
7
|
Write FFFF (hex) into registers 40001 and 40002.
|
|
Step
|
Procedure
|
|---|---|
|
8
|
Active light should now be blinking.
|
|
9
|
Look at registers 30001 and 30002 in binary format, all bits should be set to a one indicating a returned fault. The fault is present as a result of the open-load condition of the outputs. The module is correctly monitoring its output points and is being read properly by the controller.
|