|
B875–111 Analog Input, Calibration
|
|


|
(Original Document)
|
|
B875–111 Analog Input, Calibration
|
|
|
(Original Document)
|
|
Step
|
Action
|
|---|---|
|
1
|
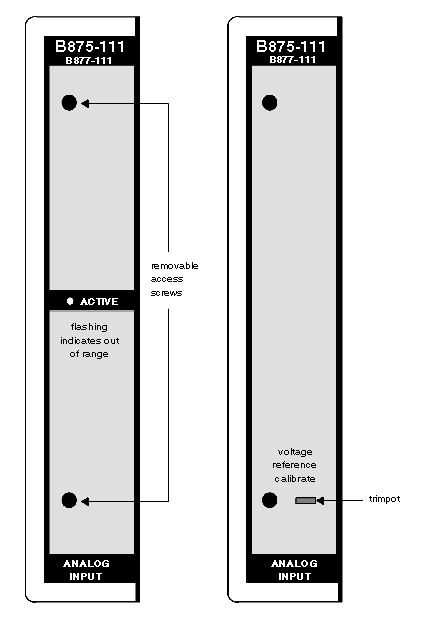
Remove two screws and label located on front-panel of analog input module to allow access to trim pot.
Note: The trim pot adjusts the total magnitude of the range (full scale). Refer to trim-pot location diagram, below.
|
|
2
|
Open analog input module handle to expose connectors and terminals.
|
|
3
|
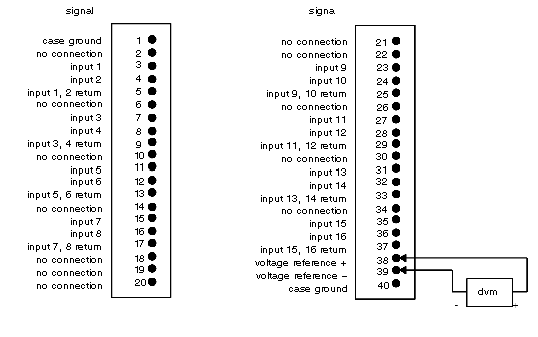
Connect digital voltmeter (DVM) minus lead to voltage reference - (terminal number 38) and plus lead to voltage reference + (terminal number 39). Refer to voltmeter connection diagram, below.
Note: Field wiring may remain connected during calibration. Five minutes of warm-up is sufficient to attain temperature stability.
|
|
4
|
Adjust reference voltage trim pot for an indication of 4.500 V 0.0001 V.
|
|
5
|
Secure trim pot in place with adhesive.
|
|
6
|
Disconnect voltmeter, return connections to their pre-calibration state, close module handle. Replace front label removed in step 1, above.
|