|


|
(Original Document)
|
|
|
(Original Document)
|
 DANGER DANGER |
|
ELECTRIC SHOCK
To install these accessories the Atrium processor card, and so the PC, must be disconnected from the mains power supply.
Failure to follow these instructions will result in death or serious injury.
|
|
Step
|
Action
|
Illustration
|
|---|---|---|
|
1
|
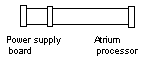
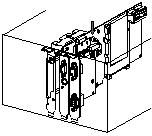
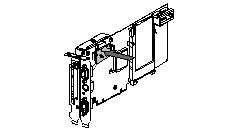
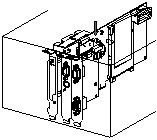
As the processor card is fitted in the PC, fit the power supply card in the slot available for this as indicated in the illustration opposite and connect the connection ribbon cable to the J4 connector of the processor card.
|
 |
|
2
|
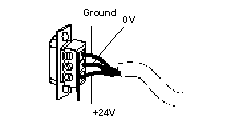
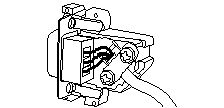
Connect the female connector to the external power supply by cable while respecting the pinouts shown opposite.
Connect the 3 wires of the power supply cable taking care to respect the polarities.
|
 |
|
3
|
Mount the connector in its cover, secure the cable to it (see diagram opposite) and close the cover by pressing down firmly.
|
 |
|
4
|
Connect the power supply cable to the power supply connection of the card
|
|
Step
|
Action
|
Illustration
|
|---|---|---|
|
1
|
Remove the line terminator A/ located on the processor.
|
 |
|
2
|
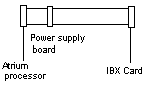
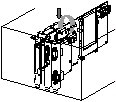
Install the daughterboard instead of the line terminator A/.
|
 |
|
3
|
As the processor card is fitted in the PC, fit the power supply card in the slot available for this as indicated in the illustration opposite and connect the connection ribbon cable to the J4 connector of the processor card.
|
 |
|
4
|
Connect the cable to the connector of the daughterboard installed in step 2.
The cable is equipped with 3 connectors. The middle connector must be connected if a TSX IBX 100 card is used.
|
 |
|
5
|
Carry out steps 2 , 3 and 4 as described in the installation procedure for a 24 V power supply only.
|