Introduction
You may want to use an EtherNet/IP device for which no DTM is in the catalog. In that case, use these instructions to import the EDS files into the catalog to create a corresponding DTM.
Control Expert includes a wizard you can use to add one or more EDS files to the Control Expert . The wizard presents instruction screens to execute these commands:
Simplify the addition of EDS files to the .
Provide a redundancy check when you add duplicate EDS files to the .
Adding EDS Files
Open the dialog box:
Step |
Action |
|---|---|
1 |
Open a Control Expert project that includes an Ethernet communication module. |
2 |
Open the (). |
3 |
In the , select a communication module. |
4 |
Right-click on the communication module and scroll to . |
5 |
In the window, click . |
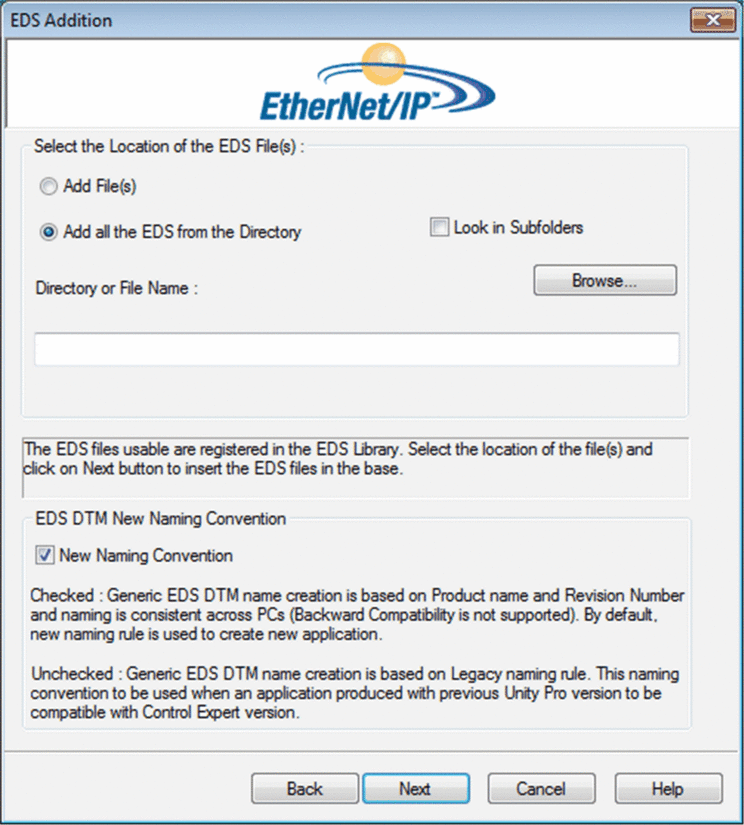
You can now see this page:

Add one or more EDS files to the library:
Step |
Action |
|---|---|
1 |
Use these commands in the area of the dialog box to identify the location of the EDS files:
|
2 |
Click to open a navigation dialog box. |
3 |
Select the location of the EDS file(s):
NOTE: Keep the location selected (highlighted).
|
4 |
Click to close the navigation window. NOTE: Your selection appears in the field.
|
5 |
Choose the naming convention rule for the EDS DTM name creation. The new naming convention is based on Model Name / Product Name and Revision. A random character is automatically suffixed when Model Name / Product Name and Revision of an EDS file in the library is identical. The new naming convention is irrespective of the order in which EDS files are added to device library. By default, the check box is selected and the new naming rule applies. NOTE: To keep backward compatibility
with Unity Pro/Control Expert versions, unchecked
the check box and the naming rule is based on Model Name
/ Product Name.
|
6 |
Click to compare the selected EDS files to the files in the library. NOTE: If one or
more selected EDS files is a duplicate, a message appears.
Click to hide
the message.
|
7 |
The next page of the wizard opens. It indicates the status of each device you attempted to add:
NOTE: You can click to open and view the selected
file.
|
8 |
Click to add the non-duplicate files. Result: The next page of the wizard opens to indicate that the action is complete. |
9 |
Click to close the wizard. Result: The hardware catalog automatically updates. |


 (green): The
  (blue): There is a redundant file.
 (red): There is an invalid