|
Configure Address Server Page
|
|
|
Original instructions
|

|
Step
|
Action
|
|---|---|
|
1
|
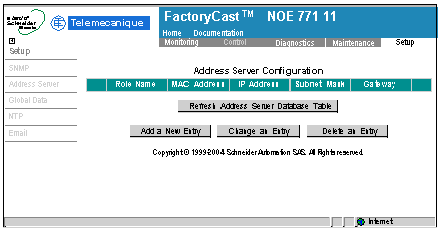
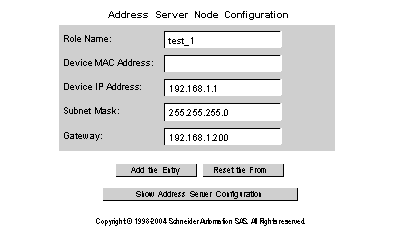
Press Add a New Entry. A dialog appears in the web frame:
 Note: The system does not allow you to enter text in both the Role Name and Device MAC Address text fields. Create either a DHCP configuration (Role Name) or a BOOTP (Device MAC Address) configuration.
|
|
2
|
For the address server configuration type (DHCP or BOOTP), enter text in the appropriate field:
|
|
3
|
Enter an address in the Device IP Address field. (We have provided an example address.)
|
|
4
|
Enter an address in the Subnet Mask field. (We have provided an example address.)
|
|
5
|
Enter an address in the Gateway field. (We have provided an example address.)
|
|
6
|
Press the Add the Entry button.
|


|
Button
|
Function
|
|---|---|
|
Change an Entry
|
Change the table data for the entry.
|
|
Delete an Entry
|
Delete the entry from the table data for the entry.
|
|
Note: The selected radio button has no effect on the Add a New Entry function.
Note: You can press the Refresh Address Server Database Table button to refresh the table data at any time.
|
|