|
Configuration Methodology for an Ethernet Network
|
|


|
Original instructions
|
|
Configuration Methodology for an Ethernet Network
|
|
|
Original instructions
|
|
Stage
|
Description
|
|---|---|
|
1
|
Creation of an Ethernet logic network (see note 1)
|
|
2
|
Configuration of an Ethernet logic network (see note 1)
|
|
3
|
Declaration of the module (see note 2)
|
|
4
|
Association of the module with the logic network (see note 2)
|
|
Note 1: Run from the project browser
|
|
|
Note 2: Run from the hardware configuration editor
|
|
|
Step
|
Action
|
|---|---|
|
1
|
Right-click the Network subdirectory of the Communication directory in the Project browser, and select the Add Network option. The Add Network screen appears:
 |
|
2
|
Choose Ethernet in the list of available networks and choose a meaningful name for your selection:
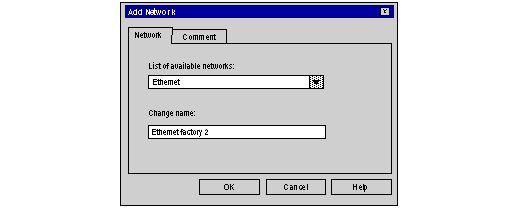 Note: If desired, a comment may be added by clicking on the Comment tab.
|
|
3
|
Click OK, and a new logic network is created. The new Ethernet network appears in the project browser.
 Note: As you can see, a small icon indicates that the logical network is not associated with a PLC device.
|
|
Step
|
Action
|
|---|---|
|
1
|
Open the project browser in order to see the logic networks of your application.
 |
|
2
|
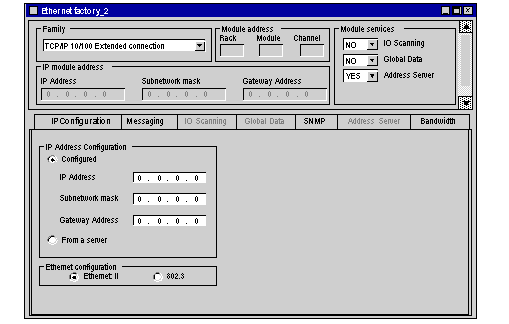
Right-click the Ethernet logic network to be configured, and select Open. The Ethernet configuration screen is displayed.
 |
|
3
|
Choose the model family of your network. (To help you, a popup menu appears when you place your mouse over the selection menu.)
Note: The network can then be configured following the instructions given in the rest of this document by consulting the chapters describing the configuration procedures for each module type.
|
|
Step
|
Action
|
Result
|
|---|---|---|
|
1
|
Open the hardware configuration editor.
|
|
|
2
|
Click twice on the empty slot in which you wish to place the module.
|
The module catalog window appears.
|
|
3
|
Choose the Communication family.
|
|
|
4
|
Choose the desired Ethernet module from the list of Communication family modules.
|
The module appears in the rack (see note).
|
|
Note: In the case of Ethernet solutions integrated in the processors, the Ethernet communication channel is automatically declared when a processor is chosen.
|
||
|
Step
|
Action
|
|---|---|
|
1
|
Open the hardware configuration editor.
|
|
2
|
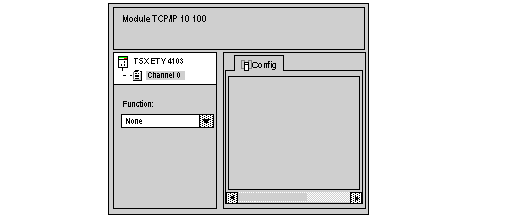
Click twice on the module slot.
 |
|
3
|
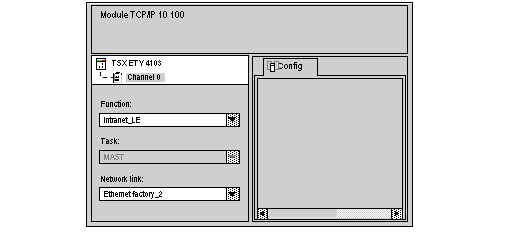
In the Function zone, select the network to be associated with the card. Then, in the Network link zone, select the logic network you wish to associate with the Ethernet channel of the module.
 |
|
4
|
Confirm your choice and close the window. The Ethernet factory_2 logic network is associated with the Ethernet TSX ETY 4103 module. The module address is written in the logic network's configuration window. The icon associated with this logic network changes and indicated the links with a PLC.
 |
