|
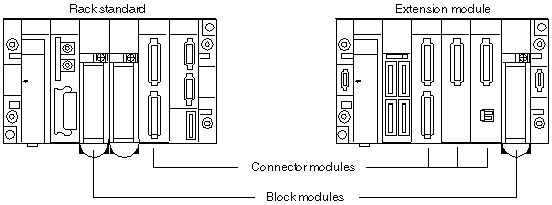
Installing Analog Modules
|
|


|
(Original Document)
|
|
Installing Analog Modules
|
|
|
(Original Document)
|
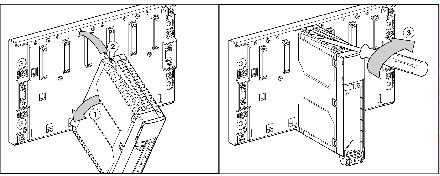
 CAUTION CAUTION |
|
MODULE DAMAGE
Installation and dismantling of modules must be done with terminal block TSX BLY 01 disconnected. Similarly, the external 24 V terminal block of module TSX ASY 800 must be disconnected.
Failure to follow these instructions can result in injury or equipment damage.
|
|
Step
|
Action
|
|---|---|
|
1
|
Position the two lugs at the rear of the module (the lower part of the module) in the centring holes located on the lower part of the rack.
|
|
2
|
Pivot the module upwards so as to pin it to the back connector of the rack.
|
|
3
|
Fix the module to the rack by tightening the screw located on the upper part of the module.
|
|
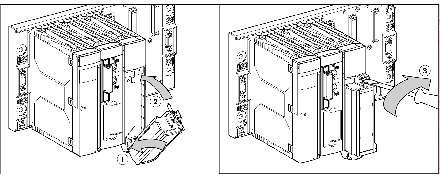
Step
|
Action
|
|---|---|
|
1
|
Once the module is in place on the rack, install the terminal block by inserting the encoder of the terminal block (lower rear part) into that of the module (lower front part) as shown below.
|
|
2
|
Pivot the terminal block to bring it into position to pin it on the module.
|
|
3
|
Fix the terminal block to the module by tightening the screw located on the upper part of the terminal block on the module.
|
