|
Connecting to the Advantys STB Island
|
|
|
Original instructions
|
|
Step
|
Action
|
|---|---|
|
1
|
Startup the Advantys configuration software on your PC. A dialog opens displaying available project types.
|
|
2
|
Select STB.
|
|
3
|
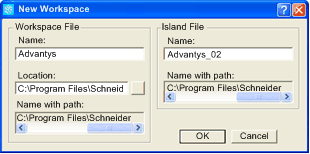
Select File → New Workspace. The New Workspace window opens (below).
|
|
4
|
For this example, type in the following field values:
 |
|
5
|
Click OK. The Advantys configuration software displays an empty DIN rail in the center of the screen.
|
|
6
|
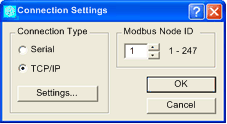
Select Online → Connection Settings. The Connection Settings window opens (below).
|
|
7
|
In the Connection Settings window, accept the Modbus Node ID default setting of 1, select TCP/IP, and click the Settings... button:
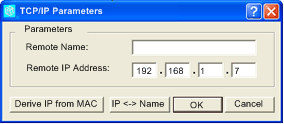
 The TCP/IP Parameters dialog opens (below).
|
|
8
|
In the Remote IP Address field, type in the IP address for the STB NIP 2212, in this example: 192.168.1.7.
 |
|
9
|
Click OK to close the TCP/IP Parameters dialog, and click OK again to close the Connection Settings dialog.
|
|
10
|
Select Online → Connect. The Data Transfer dialog opens (below):
 |
|
11
|
Select Upload in the Data Transfer dialog. The island workspace is populated with island data and shows the STB NIP 2212 and the island modules (below):
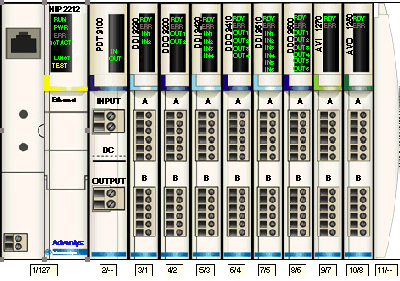 Note: A box appears beneath each module containing one or two integers—for example
 . These integers serve the following purpose: . These integers serve the following purpose:
|
|
12
|
Select Island → I/O Image Overview. The I/O Image window opens to the Fieldbus Image page:
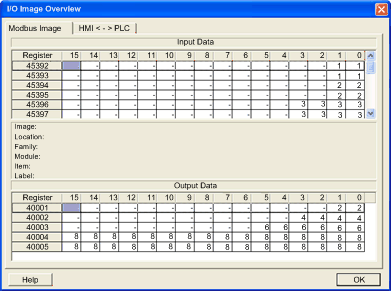 Each table cell contains an integer that identifies the relative rack position of a data producing/receiving module with input or output data in that cell. For example:
NOTE:
|