|
Configuring the ATV 31 in PowerSuite
|
|
|
(Original Document)
|
|
Step
|
Action
|
|---|---|
|
1
|
Connect your PC, on which PowerSuite for ATV 31 is installed, to the RJ45 connector on the servodrive to be configured.
|
|
2
|
Start PowerSuite for ATV 31,
Result: the following start-up screen is displayed:
 |
|
3
|
Choose Action and then Connect.
Result: a text box is displayed.
|
|
4
|
Type a project name (ATV31_MFB) and then click on OK.
Result: a transfer confirmation window is displayed.
|
|
5
|
Press Alt F to start transferring data from the servodrive to the connected work station.
|
|
Step
|
Action
|
|---|---|
|
1
|
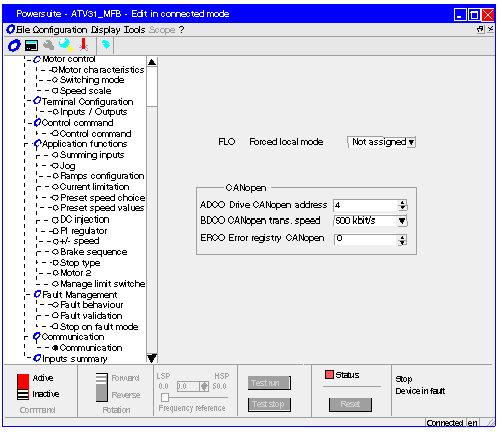
Following a connection and transfer of the device’s configurations, PowerSuite displays a configuration screen in a new window that gives access to device control, tuning and monitoring functions.
Use the command Display → Configuration.
In the tree structure displayed, choose Communication in the Communication directory.
Result: the following window is displayed:
 |
|
2
|
In the ADCO line, the CANopen address must be set to 4.
|
|
3
|
In the BDCO line, the CANopen bus speed must be set to 500.
|
|
4
|
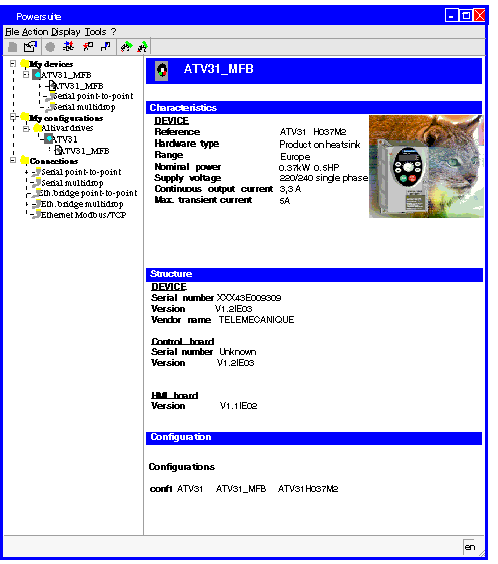
Close the window to disconnect.
Note: it is possible to adjust the servodrive’s settings with the same procedure.
Result: the following screen is displayed, showing the data saved locally:
 |