

Using Unity Loader
Use Unity Loader to install firmware upgrades for the 171 CBU 78090, 171 CBU 98090 and 171 CBU 98091 processors. Unity Loader is a stand-alone utility that ships with your Control Expert software.
Installing Unity Loader
Insert the Unity Loader installation CD in the CD-ROM drive of your maintenance PC. Autorun launches the setup automatically. If not, double-click Setup.exe. The Unity Loader Installation Wizard will guide you through the Unity Loader installation.
Processor Ports
After Unity Loader is installed on your maintenance PC, connect the PC to the processor. You can connect your maintenance PC to the processor using the following processor ports:
Processor |
Port |
|---|---|
171 CBU 78090 |
USB port |
171 CBU 98090 |
USB port Ethernet port |
171 CBU 98091 |
Connecting Unity Loader to the Processor
To establish a connection between Unity Loader and the processor, follow these steps:
Step |
Action |
|
|---|---|---|
1 |
Open Unity Loader on your PC: . Unity Loader opens and displays the tab: 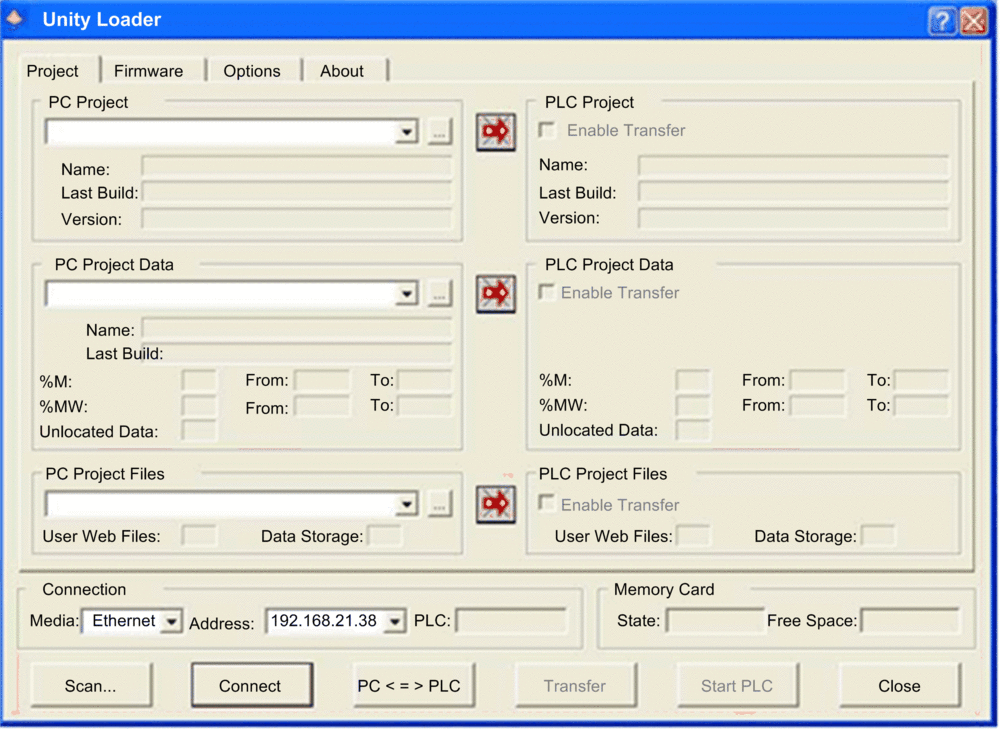 |
|
2 |
In the part of the page, make the following settings: |
|
Media |
Select either:
|
|
Address |
Select or type in the address of the processor, for example:
|
|
3 |
Click . |
|
Performing the Upgrade
Before beginning a firmware upgrade, confirm that the processor is in Stop mode.
The firmware upgrade for a processor is contained in a file with an .LDX extension. The single .LDX file contains the necessary processor firmware upgrades.
Each of the 3 versions of the processors requires the use of a unique .LDX file. Before upgrading the firmware, Unity Loader confirms that the firmware upgrade file is compatible with your processor.
Do not interrupt the firmware download process:
Do not allow an interruption to the power or the communications during the firmware upgrade process.
Do not shut down the Unity Loader software during the upgrade.
If the firmware download process is interrupted, the new firmware is not installed and the adapter continues to use the old firmware. If an interruption occurs, restart the process.
Open Unity Loader on your PC and update the firmware for the remote I/O adapter:
Step |
Action |
|---|---|
1 |
After Unity Loader has connected to the module, click the tab: |
2 |
In the area, click the ellipsis () button to open a dialog where you can navigate to and select the firmware file for your Momentum processor. The firmware is contained in a Unity Loader file (.ldx extension). After you select the firmware file and close the dialog, the selected revision of this firmware is displayed in the list on the left, and the current version of the firmware is displayed in the list on the right. 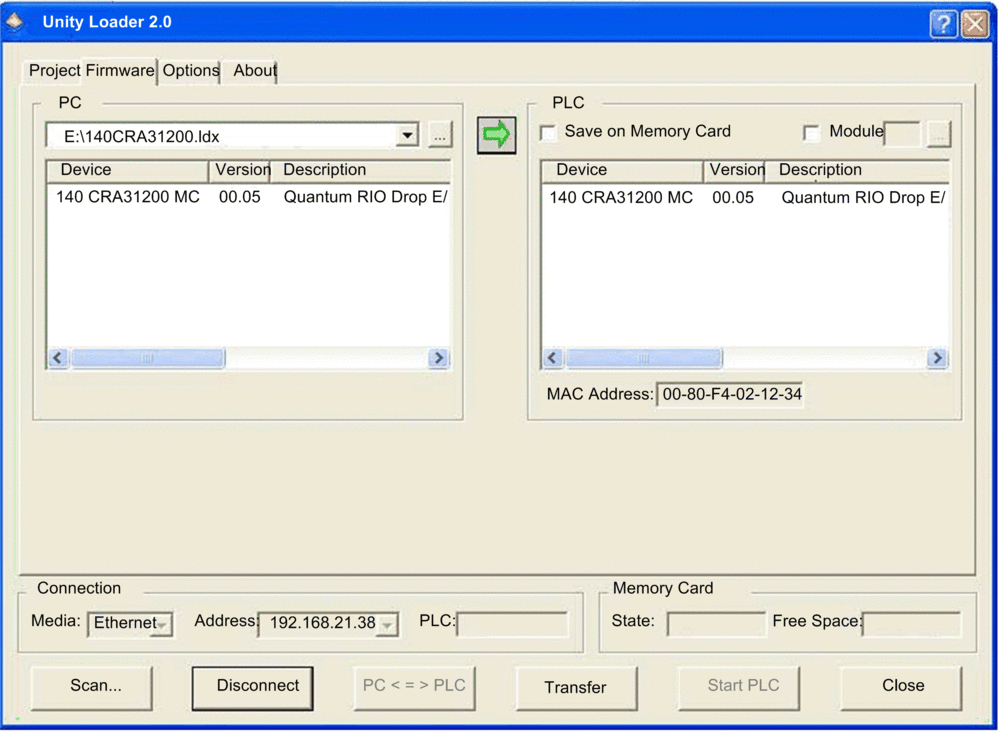 |
3 |
When the arrow in the middle of the screen (above) is green, click . NOTE: Only click if the arrow is green. A yellow
arrow indicates that the firmware file on your computer is the same
version or newer than the file selected for transfer; a red arrow
indicates that the firmware on the computer is not compatible with
the Momentum processor.
|
4 |
Click on the 2 dialogs that appear. A third dialog appears (below), which indicates the transfer status with the blue bars at the bottom of the screen. After the transfer is complete, click . 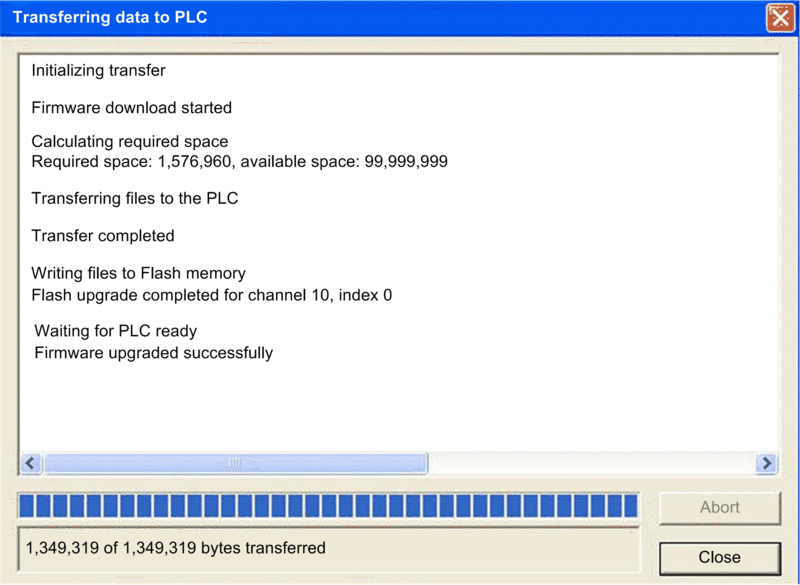 |
5 |
In the Unity Loader software, click and close the window. |
6 |
Reboot the processor to finalize the firmware update. |
Unity Loader includes its own user documentation. Refer to Unity Loader, User Guide for assistance when you perform the firmware upgrade.