

Tools
Use 2 screwdrivers:
a PZ 2 Phillips head screwdriver to remove the ground screw.
a flat-head screw driver to disengage locking tabs.
Removing an Adapter from an I/O Base
Electrical circuitry on the I/O base may be exposed when a Momentum processor or other adapter is not mounted.
| DANGER | |
|---|---|
To disassemble the processor and I/O base, follow these steps:
Step |
Action |
|---|---|
1 |
Work in a clean environment when you disassemble the processor and I/O base assembly. |
2 |
Remove power from the I/O base by removing the terminal connectors. |
3 |
Remove the assembled unit from its DIN rail or panel mounting surface. |
4 |
If the I/O base includes a fixed standoff ground nut, remove the label on the front of the processor. Removing the label exposes the ground screw aperture located on the right front of the processor. NOTE: This step applies
only to assemblies with an I/O base that includes a standoff ground
nut on its printed circuit board.
|
5 |
Use a PZ 2 phillips head screwdriver to remove the grounding screw. NOTE: This step applies
only to assemblies with an I/O base that includes a standoff ground
nut on its printed circuit board.
|
6 |
Use the flat-head screwdriver to push in and disconnect the single locking tab on the right side of the module (1), and the 4 locking tabs on the top of the module (2): 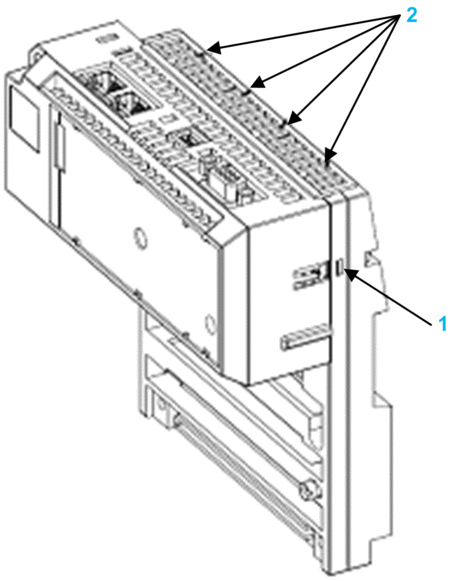 |
7 |
After the locking tabs have been disengaged, use the flat-head screwdriver to release the 2 stabilizing snaps (3 and 4) on the bottom of the processor: 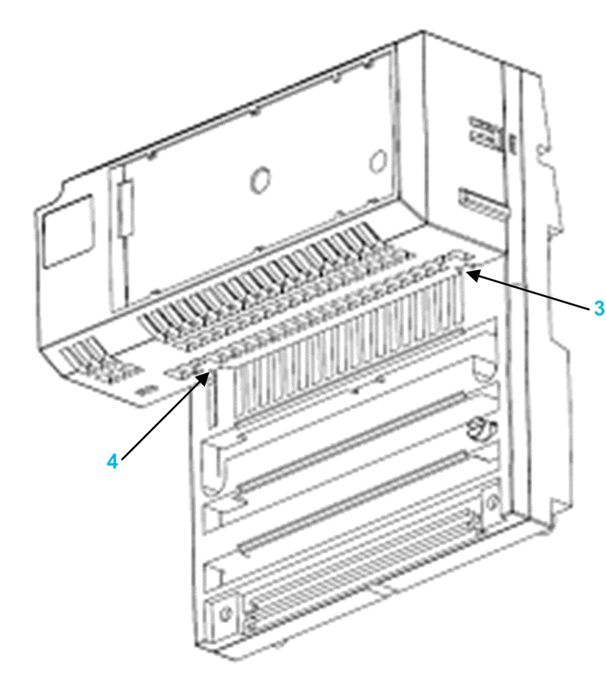 |
8 |
To remove the processor from the I/O base, rotate the side of the processor, which was previously detached in step 6, up and away from the base in a circular motion (5). Then push the processor in the indicated direction (6) to disengage it from the processor: 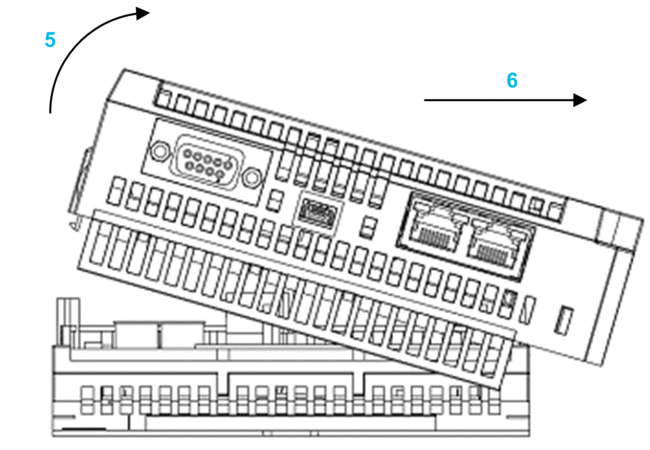 |