

Web Configuration
To configure the firewall, open an Internet browser and enter the following URL:
https://[IPFirewall]/admin
Click Enter and use default username/password
combination admin/private to log in.
Configuring the Routes
To configure the routes, proceed as follows:
Step |
Action |
|---|---|
1 |
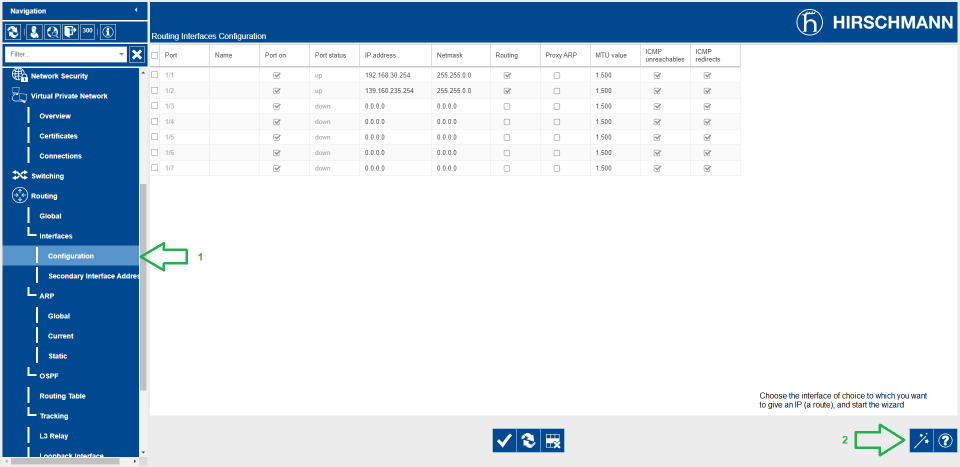 1. On the Navigation left pane open webpage. Choose the Ethernet interface you want to configure. 2. Click the |
2 |
Set an ID number to the VLAN you want to configure (1 in the example), then click Next. 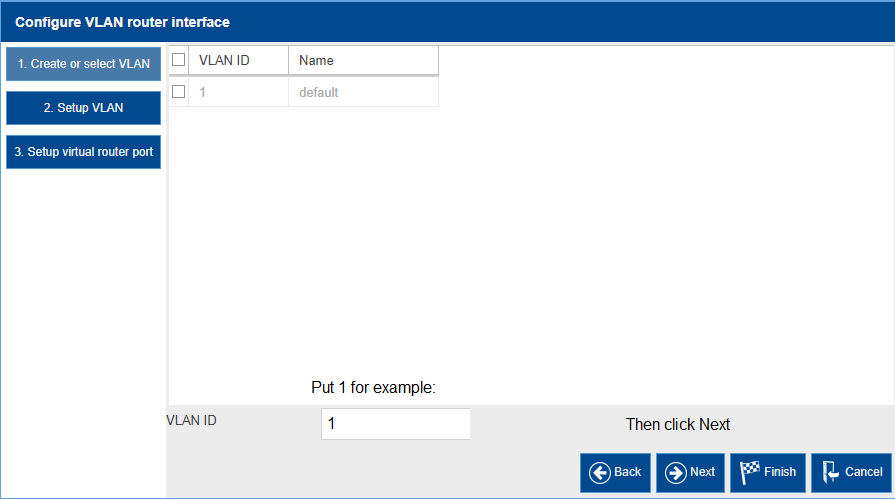 |
3 |
Set a route name to the VLAN you want to configure (RouteName in the example), then click Next. 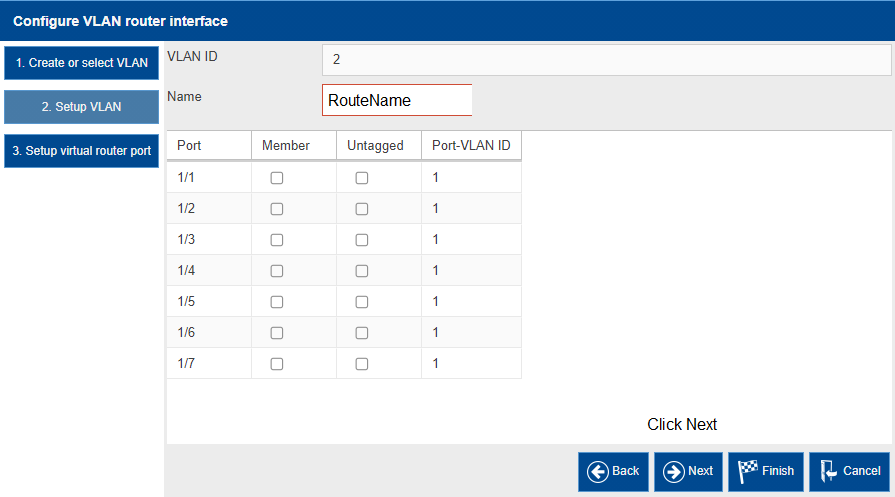 |
4 |
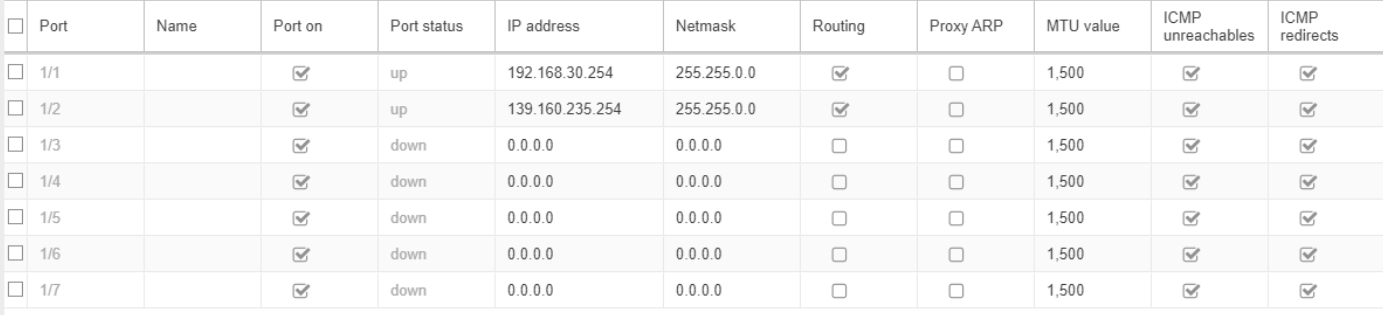
Set the IP address of the Control Network and its mask, ( 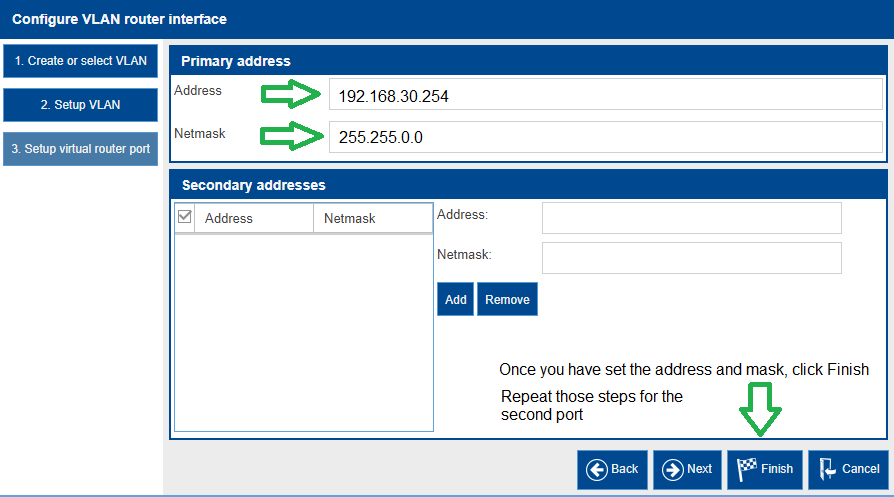 |
5 |
Repeat the steps 1 to 4 for the Machine Network using the second Ethernet interface. |
In the following example we have set the control network
gateway interface of the firewall to 192.168.30.254/16 on the physical port n°1 and machine network to 139.160.235.254/16 on the physical port n°2.
Configuring the VPN in the Firewall
To configure the VPN, proceed as follows:
Step |
Action |
|---|---|
1 |
On the left pane of the web page,
click on menu. Click the |
2 |
Choose an index number and a name then click Next. |
3 |
Choose a password (PSK) then click Next. |
4 |
Fill up the IP addresses and masks according to your network.
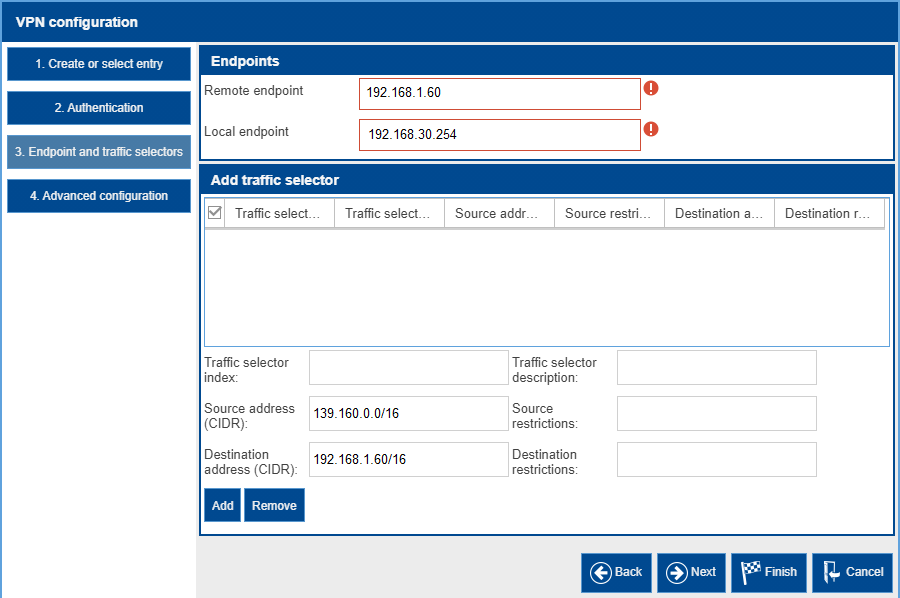 Click Next. |
5 |
Set a margin time. The default value is 150. Set IKE Version to ikev2 then click Finish. |
Configuring the VPN Client
To configure the VPN client, proceed as follows:
Step |
Action |
|---|---|
1 |
Download and install the VPN client software. |
2 |
On the left pane of the VPN Client window, right click VPN Configuration and choose Wizard. |
3 |
Choose IKEv2 Tunnel and click Next. |
4 |
Set the IP address of the firewall accessible via the Control Network interface (192.168.0.254 in the example). Enter the PSK previously selected. 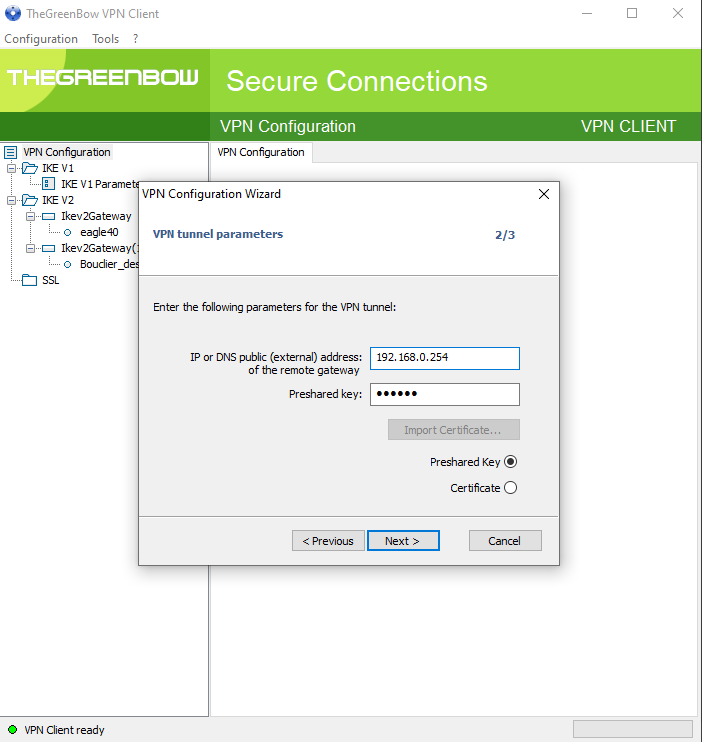 Click Next, then click Finish. |
5 |
On the left pane of the VPN Client window, right click on the Ikev2 tunnel just created and rename it. |
6 |
Right click on the just renamed Ikev2 tunnel and select Open Tunnel. A notification confirms that the secure connection has been established.  |