

Introduction
To avoid links overlapping each other, they can also be represented in the form of connectors, see also section Links in the Reference manual.
Displaying links as connectors
Displaying links as connectors:
Step |
Action |
|---|---|
1 |
Select the desired link. Example:  |
2 |
Use the menu command. or Use the menu command from the shortcut menu. Result: The link is displayed as a connector. Example:  |
Displaying connectors as links
Displaying connectors as links:
Step |
Action |
|---|---|
1 |
Select the desired connector. Example:  |
2 |
Use the menu command from the shortcut menu. Result: The connector is displayed as a link. Example: 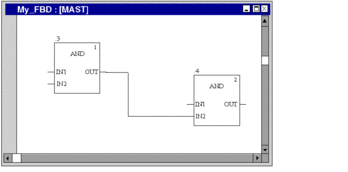 Note: Although the connector is now displayed as a link, the name of the connector is still occupied and cannot be used for another link. If the connector name is used for another link, the connector must be explicitly deleted, see Deleting connectors. |
Renaming connector
Renaming connector:
Step |
Action |
|---|---|
1 |
Double-click the target connector (source). Result: The editor mode is activated. |
2 |
Enter the new name. Note: The name must be unique within the current section and may not already be used by a connector, this also applies to connectors that are to be displayed as links. To enable an occupied connector name, the connector must be explicitly deleted, see Deleting connectors. Confirm the entry using Enter. Result: The connector (source and target) is renamed. Example: 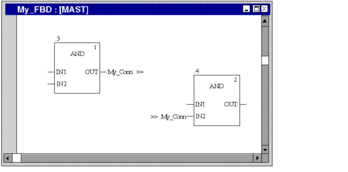 |
Deleting connectors
Deleting connectors:
Step |
Action |
|---|---|
1 |
Select the desired connector. Example: 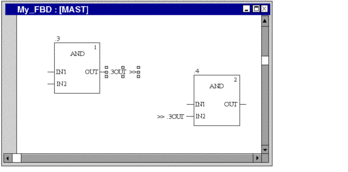 |
2 |
Use the menu command from the shortcut menu. Result: The connector is displayed as a link. Example: 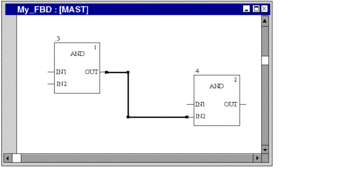 |
3 |
Use the menu command from the shortcut menu. Result: The connector is deleted. |