At a Glance
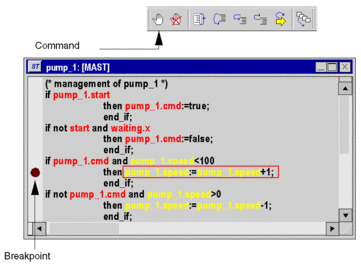
A breakpoint can be used to stop the execution of the task at the point at which it was set.
During debugging it can be used:
to examine the behavior of the code,
to view the value of variables.
There is a single breakpoint at a given point in the project. This is not saved and is lost on disconnection from the PLC.
It is implemented in online mode regardless of whether the PLC is in Run or in Stop.
Element Used for Setting a Breakpoint
The program element used to set a breakpoint is an instruction.
In other words, the following program section:
Line 1 (*Example*)Line 2 IF(%MW10=14) THEN (*Test condition*)Line 3 %MW45:=68; (*Execution if condition true*)Line 4 ELSELine 5 %MW45:=24; (*Execution if condition false*)Line 6 END_IF;Line 7 %MW10:=12; DFB1_3(prms); %MW0:=%MW0+1;Line 8Lines 2, 3, 5 and 7 can hold a breakpoint.
Lines 1, 4, 6 and 8 cannot hold a breakpoint.
How to Insert a Breakpoint
Carry out the following actions:
Step |
Action |
|---|---|
1 |
Select the desired program element. |
2 |
Set the breakpoint:
|
Example:

From the menu, select the Debug->Show Breakpoint command to locate the breakpoint by displaying the section where it has been set in the language editor.
How to Delete a Breakpoint
Either you can:
select the Debug->Clear Breakpoint command from the menu,
or select the
 button in the debug toolbar.
Erasing a breakpoint does not restart the task. To do this,
you have to press  .
.


 button in the debug toolbar.