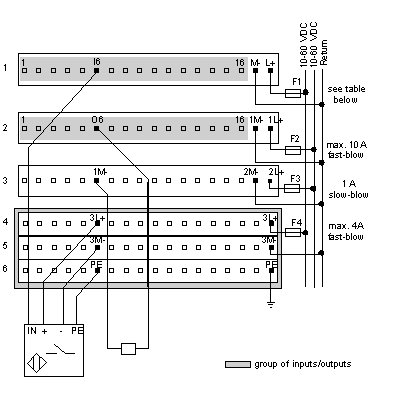
This section provides diagrams to assist you in wiring the following types of devices:
The diagram below shows an example of wiring two-wire devices.
Fuse table for F1
|
Voltage
|
Fuse
|
|
12 VDC
|
1 A slow-blow
|
|
24 VDC
|
1 A slow-blow
|
|
48 VDC
|
1 A slow-blow
|
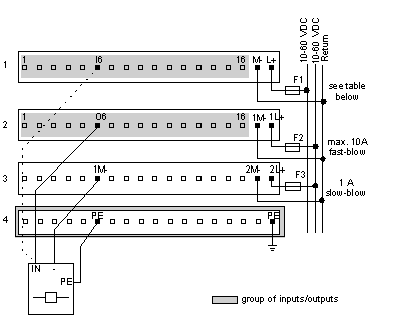
Sensor Activated by Output
The wiring diagram below shows an example of a sensor activated by an output. The diagram shows the sensors being supplied with voltage only when the outputs on pins 6 and 14, row 2, are high. The inputs from pins 6 and 14, row 1, can be high only when the associated outputs are high.
Fuse table for F1
|
Voltage
|
Fuse
|
|
12 VDC
|
1 A slow-blow
|
|
24 VDC
|
1 A slow-blow
|
|
48 VDC
|
1 A slow-blow
|
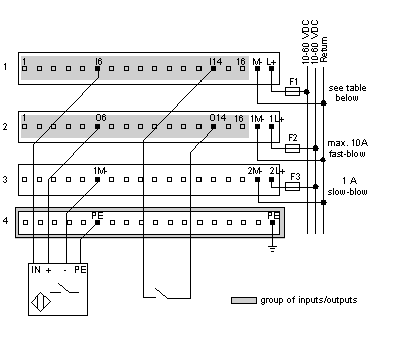
Four-Wire Sensor with a Two-Wire Actuator
The diagram below shows a four-wire sensor with a two-wire actuator. The process of wiring a three-wire sensor is very similar to the one below. Because three-wire sensors do not require PE, a two-row busbar could be used instead of the three-row busbar shown.
Fuse table for F1
|
Voltage
|
Fuse
|
|
12 VDC
|
1 A slow-blow
|
|
24 VDC
|
1 A slow-blow
|
|
48 VDC
|
1 A slow-blow
|
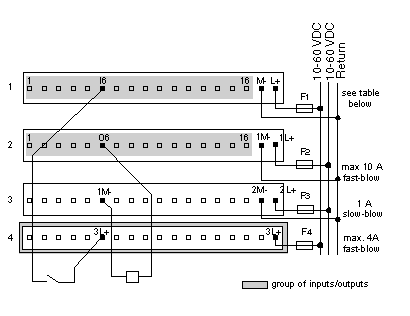
The diagram below shows a three-wire actuator with an optional wiring scheme for broken wire detection. The dotted line reads back whether or not current has reached the actuator. When the output on pin 6, row 2, is high, the input from pin 6, row 1, must also be high.
Fuse table for F1
|
Voltage
|
Fuse
|
|
12 VDC
|
1 A slow-blow
|
|
24 VDC
|
1 A slow-blow
|
|
48 VDC
|
1 A slow-blow
|
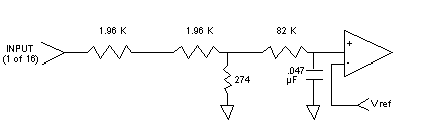
Simplified Input Schematics
The following diagram shows the field-side input circuitry.
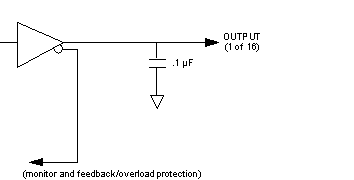
Simplified Output Schematics
The following diagram shows the field-side output circuitry.