|
Upgrading Firmware with Unity Loader
|
|
|
Original instructions
|
|
Step
|
Action
|
|
|---|---|---|
|
1
|
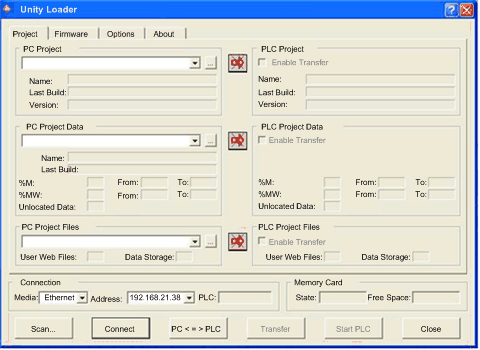
Open Unity Loader on your PC: Start → Programs → Schneider Electric → Unity Loader. Unity Loader opens and displays the Project tab:
 |
|
|
2
|
In the Connection part of the page, make the following settings:
|
|
|
Media
|
Select Ethernet
|
|
|
Address
|
Type in the module IP address.
NOTE: Confirm that you are using the IP address for the HART I/O module, and not the CPU. |
|
|
3
|
Click Connect.
|
|
|
Step
|
Action
|
|---|---|
|
1
|
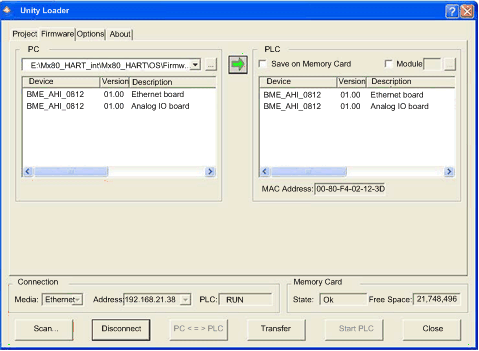
After Unity Loader has connected to the module, click the Firmware tab.
|
|
2
|
In the PLC area of the Firmware tab, confirm that the Module check-box is de-selected.
|
|
3
|
In the PC area, click the ellipsis (...) button to open a dialog where you can navigate to and select the firmware file for your module. The firmware is contained in a Unity Loader file (.ldx extension).
After you select the firmware file and close the dialog, the selected revision of this firmware is displayed in the list on the left, and the current version of the firmware is displayed in the list on the right.
 |
|
4
|
When the arrow in the middle of the screen (above) is green, click Transfer.
NOTE: Only click Transfer if the arrow is green. A yellow arrow indicates that the firmware file on your computer is the same version or newer than the file selected for transfer; a red arrow indicates that the firmware on the computer is not compatible with the module. |
|
5
|
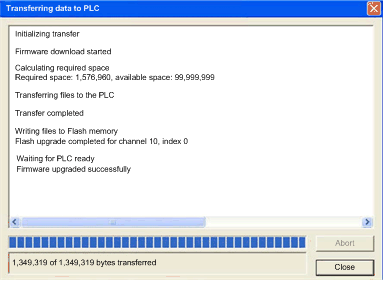
Click yes on the 2 dialogs that appear. A third dialog appears (below), which indicates the transfer status with the blue bars at the bottom of the screen. After the message “Firmware upgraded successfully” is displayed (below), click Close.
 |
|
6
|
In the Unity Loader software, click Disconnect and close the window.
The module reboots itself on completion of the firmware upgrade.
|