|
Installation and Maintenance
|
|
|
Original instructions
|
|
Step
|
Action
|
|---|---|
|
1
|
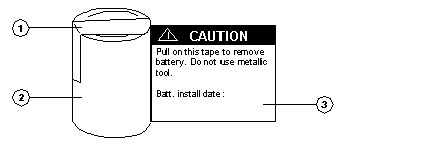
Remove the insulating strip from the plus (+) pole of the battery before inserting it into the module. This strip is used to insulate the battery when on the shelf.
Note: The battery installed in the module, when shipped, has the insulating strip in place. Remove this strip and re-install the battery before operation.
|
|
2
|
When single battery backup is required, install the battery in Battery Slot 1. The circuitry is designed so Battery 1 supplies the current until it is used up. Battery 2 (when installed) then assumes the load requirement without interruption. Battery status is indicated via LEDs and status bytes.
|
|
3
|
When the controller is in operation, the batteries can be replaced at any time.
Note: When the controller is powered OFF, battery replacement can be done without RAM loss only when a second functioning battery is installed.
|

1Insulating Strip
2Battery
3Access strip
|
Step
|
Action
|
|---|---|
|
1
|
Remove the insulating strip from the new battery.
|
|
2
|
If necessary, remove the old battery. Detach it from its housing (on the front of the module), by pulling the battery access strip until the battery pops out.
|
|
3
|
Replace it with the new battery using the reverse of the procedure in step 2.
|
 CAUTION CAUTION |
|
EQUIPMENT DAMAGE
Failure to follow these instructions can result in injury or equipment damage.
|