

At a Glance
The various available screens for the discrete modules are:
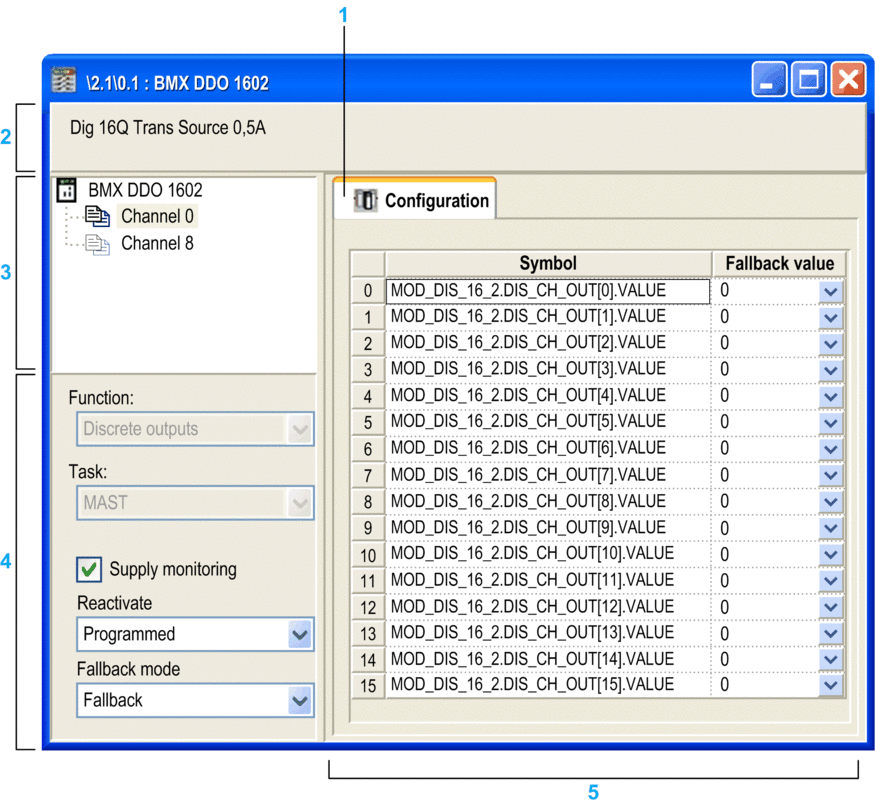
screen
Illustration
This screen shows the configuration screen:
Description
This table shows the various elements of the configuration screen and their functions.
Address |
Element |
Function |
|---|---|---|
1 |
Tabs |
The tab in the foreground indicates the mode in progress ( in this example). Every mode can be selected using the respective tab:
|
2 |
Module area |
Specifies the abbreviated heading of the module. |
3 |
Channel area |
Allows you:
NOTE: All channel are activated and a channel cannot
be de-activated to .
|
4 |
General parameters area |
Allows you to select the associated function and task in groups of 8 channels:
The check box defines the active or inactive state of the external power supply monitoring for the 16-channel group selected (available only on 16, 32 and 64 channel discrete modules). In a user application
the
The and drop-down menus enable you to configure the output reset and output fallback mode (available only on some discrete modules). |
5 |
Configuration zone |
Enables the configuration of parameters for the various channels. This field includes various items, displayed according to the selected discrete module. The column displays the symbol associated with the channel when it has been defined by the user (using the variable editor). |