|
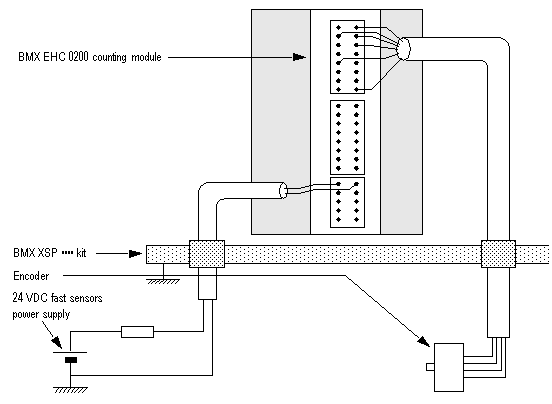
BMX EHC 0200 Module Wiring
|
|


|
Original instructions
|
|
BMX EHC 0200 Module Wiring
|
|
|
Original instructions
|
  DANGER DANGER |
|
HAZARD OF ELECTRIC SHOCK
Failure to follow these instructions will result in death or serious injury.
|
|
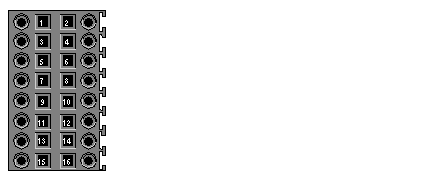
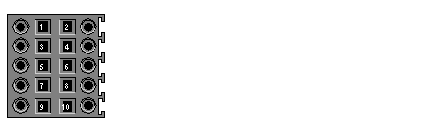
Pin number
|
Symbol
|
Description
|
|---|---|---|
|
1, 2, 7, 8
|
24V_SEN
|
24 VDC output for sensors supply
|
|
5, 6, 13, 14
|
GND_SEN
|
24 VDC output for sensors supply
|
|
15, 16
|
FE
|
Functional earth
|
|
3
|
IN_A
|
Input A
|
|
4
|
IN_SYNC
|
Synchronization input
|
|
9
|
IN_B
|
Input B
|
|
10
|
IN_EN
|
Enable input selected
|
|
11
|
IN_REF
|
Homing input
|
|
12
|
IN_CAP
|
Capture input
|
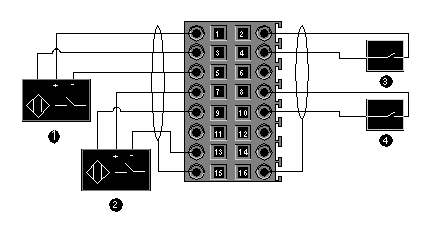
1IN_A input
2IN_B input
3IN_SYNC input (synchronization input)
4IN_EN input (enable input)
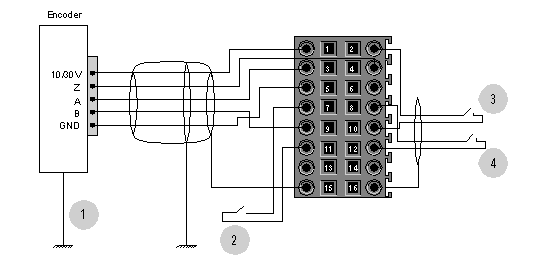
1Encoder (inputs A, B and Z)
2IN_REF input (homing input)
3IN_EN input (enable input)
4IN_CAP input (capture input)
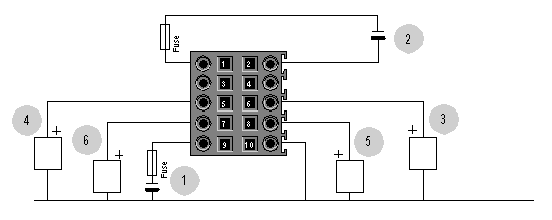
124 V supply for actuators
224 V supply for sensors
3Actuator for the Q0 output of counting channel 0
4Actuator for the Q1 output of counting channel 0
5Actuator for the Q0 output of counting channel 1
6Actuator for the Q1 output of counting channel 1
|
Pin number
|
Symbol
|
Description
|
|---|---|---|
|
1
|
24V_IN
|
24 VDC input for sensors supply
|
|
2
|
GND_IN
|
0 VDC input for sensors supply
|
|
5
|
Q0-1
|
Q1 output for counting channel 0
|
|
6
|
Q0-0
|
Q0 output for counting channel 0
|
|
7
|
Q1-1
|
Q1 output for counting channel 1
|
|
8
|
Q1-0
|
Q0 output for counting channel 1
|
|
9
|
24V_OUT
|
24 VDC input for actuators supply
|
|
10
|
GND_OUT
|
0 VDC input for actuators supply
|
|
DANGER |
|
HAZARD OF ELECTRIC SHOCK
If you cannot prove that the end of a shielded cable is connected to the local ground, the cable must be considered as dangerous and personal protective equipment (PPE) must be worn.
Failure to follow these instructions will result in death or serious injury.
|
 WARNING WARNING |
|
UNEXPECTED EQUIPMENT OPERATION
Follow these instructions to reduce electromagnetic perturbations:
In a highly disturbed environment:
Failure to follow these instructions can result in death, serious injury, or equipment damage.
|
|
NOTICE
|
|
MODULE DAMAGE
Use fast acting fuses to protect the electronic components of the module from overcurrent and reverse polarity of the input/output supplies.
Failure to follow these instructions can result in equipment damage.
|
