|
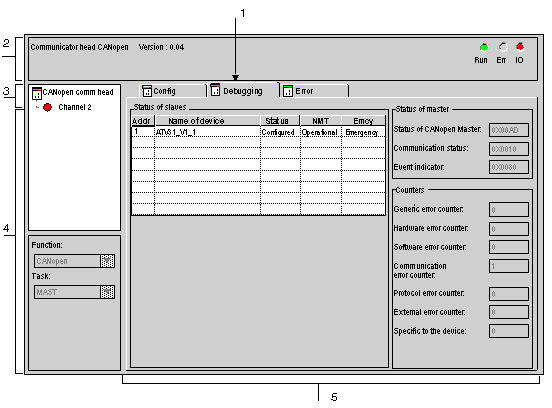
Debugging Screen of the CANopen Master for CPUs 2010/ 2030
|
|


|
(Original Document)
|
|
Debugging Screen of the CANopen Master for CPUs 2010/ 2030
|
|
|
(Original Document)
|
|
Read
|
Number
|
Channel
|
|---|---|---|
|
1
|
Tab
|
The tab in the foreground indicates the type of screen displayed. In this case, the debug screen.
|
|
2
|
Module
|
This area is made up of the abbreviated heading of the module equipped with a CANopen port, as well as 3 LEDs indicating the status of the module.
|
|
3
|
Channel
|
This area allows you to select the communication channel to be debugged.
By clicking on the device, you display the tabs:
By clicking on the channel, you display the tabs:
This area also has an LED indicating the channel status.
|
|
4
|
General parameters
|
This area is used to view:
|
|
5
|
Display and command
|
This area is composed of 3 windows which let you know:
|
