|
Execution of Application in Standard Mode
|
|


|
Original instructions
|
|
Execution of Application in Standard Mode
|
|
|
Original instructions
|

|
Step
|
Action
|
|---|---|
|
1
|
In the Project browser double-click on Configuration then on 0:Bus X and on 0:BMX XBP ••• (where 0 is the rack number).
|
|
2
|
In the Bus X window, select a slot, for example 3 and double-click on it.
|
|
3
|
Insert an analog input module, for example BMX AMI 0410 The module appears on th ePLC Bus; Double-click on it..
|
|
4
|
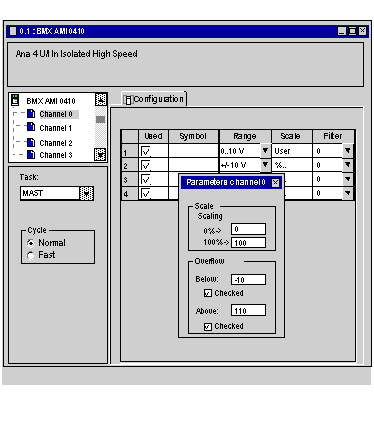
In the 0.1 : BMX 0410 window, it’s possible to configure the range and the scale of the used channels. For this application, configure the channel 0 to range 0..10V
|
|
5
|
Click in the channel 0 Scale zone. A windows opens.
Define the different values as shown in the the figure below:
 |
|
Step
|
Action
|
|---|---|
|
1
|
In the Project browser and in Variables & FB instances, double-click on Elementary variables.
|
|
2
|
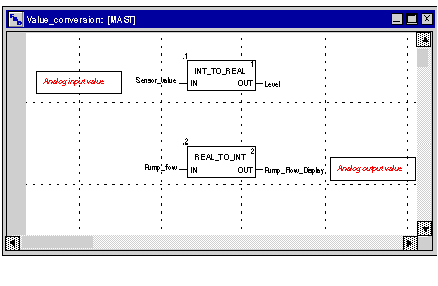
In the Data editor window, select the box in the Name column and enter a name (Sensor_value for example). Select an INT type for this variable.
|
|
3
|
In the Address column, enter the analog value address associated with the variable.
For this example, associate the Sensor_value variable with configured analog input channel by entering the address %IW0.1.0.
Illustration:
 |
|
Step
|
Action
|
|---|---|
|
1
|
In the PLC menu, click on Standard Mode,
|
|
2
|
In the Build menu, click on Rebuild All Project. Your project is generated and is ready to be transferred to the PLC. When you generate the project, you will see a results window. If there is an error in the program, Control Expert indicates its location if you click on the highlighted sequence.
|
|
3
|
In the PLC menu, click on Connection. You are now connected to the PLC.
|
|
4
|
In the PLC menu, click on Transfer project to PLC. The Transfer project to PLC window opens. Click on Transfer. The application is transferred to the PLC.
|
|
5
|
In the PLC, click on Execute. The Execute window opens. Click on OK. The application is now being executed (in RUN mode) on the PLC.
|
