

Overview
This example illustrates the import into an existing system project of two Control Expert Classic M580 control projects, PAC1 and PAC2.
The PACs of both control projects can exchange data by using a local slave configuration:
PAC2: Adapter. The BMEP582040 M580 CPU module is configured as Local Slave 1.
PAC1: Scanner. Contains a BMENOC0311 communication module in the local rack, which is configured to scan Local Slave 1 of PAC2.
The target system project does not contain any devices or PACs. The example also describes an alternate scenario in which the system project already contains a PAC that is configured with the same CPU module as Local Slave 1.
M580 Control Project Containing the Local Slave
The figure shows the CPU module of the adapter configured as Local Slave 1 with a configuration that is active in the Control Expert Classic control project PAC2 (.zef).
M580 Control Project Containing the Communication Module Scanning the Local Slave
The figure shows the BMENOC0311 module configured to scan Local Slave 1 with a configuration that is active in the Control Expert Classic control project PAC1 (.zef).
Importing the Control Project Containing the Local Slave
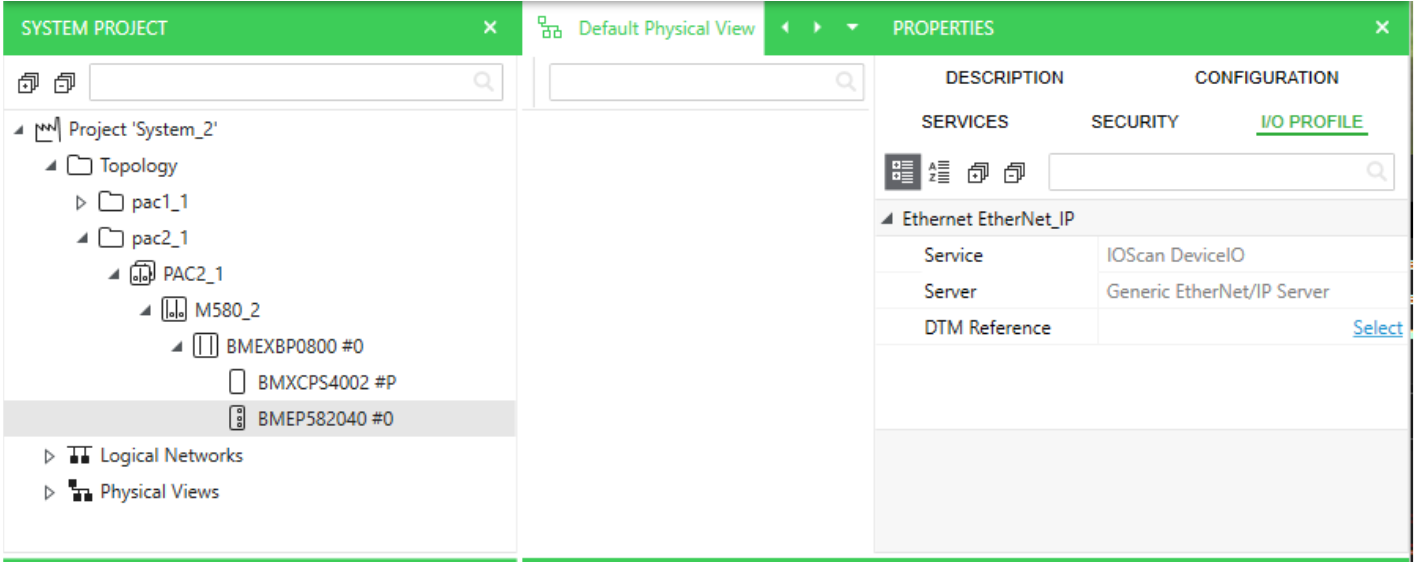
The figure shows the PAC of control project PAC2 (adapter) in the system project after import of the file (.zef) is completed. The CPU module is selected and Local Slave 1 has not been imported as shown in the tab.
Importing the Control Project Containing the Scanner
The figure shows the PAC of control project PAC1 (scanner) in the system project after import of the file (.zef) is completed.
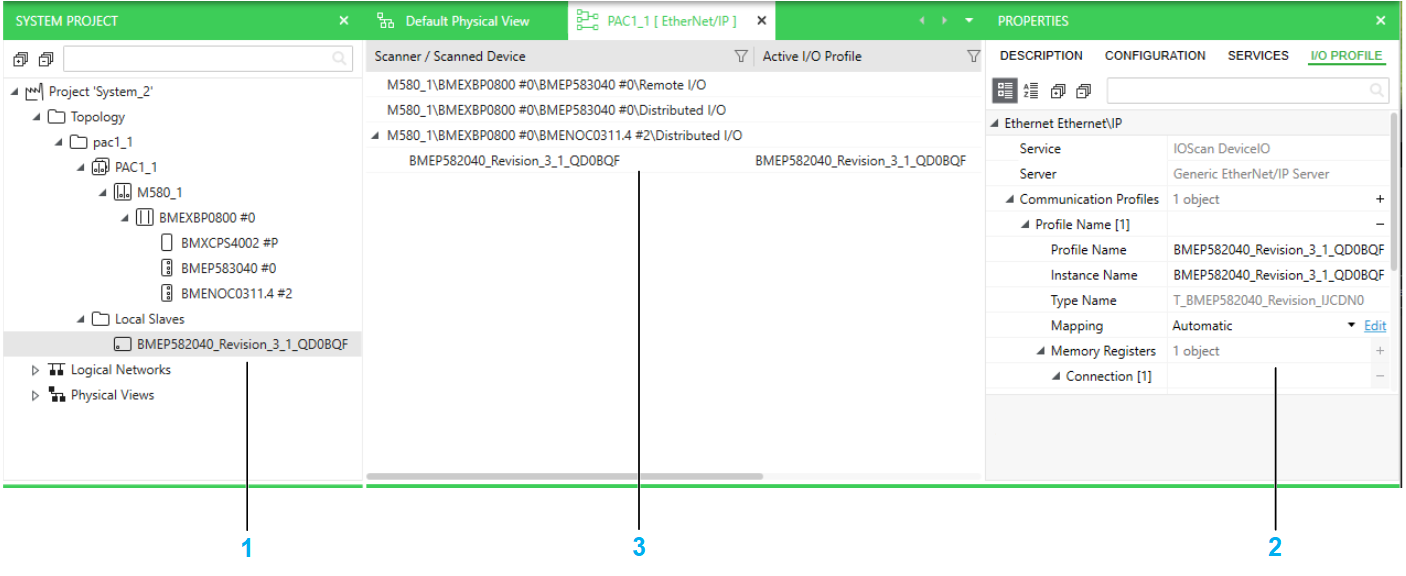
| Item | Description |
| 1 | The folder contains an EtherNet/IP device that is created during the import and configured with the data of Local Slave 1. |
| 2 | The Local Slave 1 connection data is visible in the tab of the EtherNet/IP device. |
| 3 | The active I/O profile of the EtherNet/IP device appears under the BMENOC0311 scanner in the EtherNet/IP Communication Mapping View of PAC1. |
Moving and Viewing the Imported Local Slave Configuration
The figure shows the submenu of the command where the BMEP582040 CPU module of PAC2 appears because its part number matches the device name of the EtherNet/IP device DTM. You can therefore transfer to it the Local Slave 1 configuration, which is currently associated to the EtherNet/IP device.
The figure shows the result of the move of the configuration of the EtherNet/IP device (representing Local Slave 1) to the CPU module of PAC2, which is configured as the adapter in the imported file (.zef). The device is automatically deleted from the system project after the transfer. The step of moving the local slave is optional.
| Item | Description |
| 1 | CPU module of PAC2, which has been selected in the submenu. |
| 2 | The Local Slave 1 has been transferred to the CPU module and its connection data is visible in the tab. |
| 3 | The active I/O profile that appears under the BMENOC0311 scanner in the EtherNet/IP Communication Mapping View of PAC1 refers now to the CPU module of PAC2, similarly to when you configure data exchange with a local slave directly in Topology Manager. |
The following figure shows an alternate scenario where the target system project already contains a PAC with a CPU module that has the same reference (part number) but a different IP address than the CPU module of the imported PAC2 (adapter). You can move the Local Slave 1 configuration to this CPU module instead.
| Item | Description |
| 1 | CPU module of PAC2, which has been imported. It appears separately in first position because its main IP address matches the one that is configured for the EtherNet/IP device representing Local Slave 1. |
| 2 | BMEP582040 CPU module of Standalone_Controller_1 that existed at the time of import. It appears in the submenu because its part number matches the device name of the EtherNet/IP device DTM. The PAC can be created from the catalog or imported before or after PAC2. Selecting this module enables data exchange with the BMENOC0311 communication module of PAC1. |