Local Slave Inputs and Outputs
Original instructions
Introduction
The Ethernet communication module serves as an adapter when the Active Configuration field is set to Enabled in the configuration window for one (or more) of the module’s local slave nodes.
When a local slave instance of an Ethernet communication module is enabled, the designated memory location allocated to that instance is exposed to, and can be accessed by, other devices.
The I/O data exchange, between the remote device and the local slave, is configured as part of the remote device’s configuration settings.
Configuring the I/O Items
You can configure input and output items in groups of 1 or more single bits, 8-bit bytes, 16-bit words, 32-bit dwords, or 32-bit IEEE floating values. The number of items you create depends upon the data type and size of each item.
The process for creating and defining I/O items for the local slave is the same as for any adapter class device, and depends upon the type of items you wish to create.
In support of the ongoing configuration example, the following items are required:
NOTE: The items created, below, are designed to hold data received from, or sent to, the third-party scanner. In addition to these items, it is necessary to include logic in the application programs in which the Ethernet communication module and the third-party scanner, respectively, are included. Writing this code is beyond the scope of this example.
Creating Input Word Items
To create input items for local slave 01:
Step
Action
1
Select the Input tab to open that page:
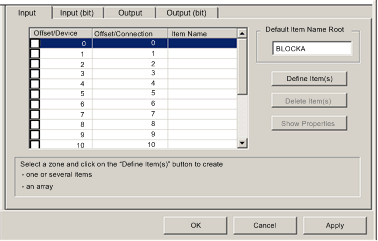
NOTE: In this example, each row represents a byte. Because the items you create will be a 16-bit words, each item consists of 2 rows.
2
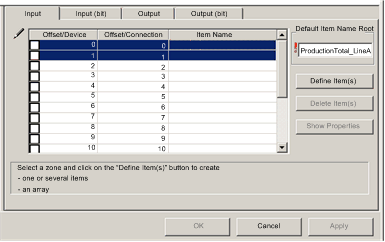
In the Default Item Name Root input box type: ProductionTotal_LineA.
3
Starting at the beginning of the table, select the first two rows: 0 and 1:
4
Click the Define Item(s) button.
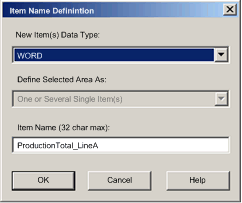
Result: The Item Name Definition dialog opens:
5
Select WORD as the New Item(s) Data Type, then click OK.
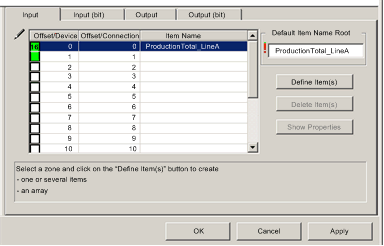
Result: A new item is created:
6
Click Apply to save the new items, and leave the page open.
7
Repeat steps 2 - 6 for each new word item you need to create. In this example, that includes the following items:
  • Rows 2-3, Default Items Name Root: ProductionTotal_LineB
  • Rows 4-5: Default Items Name Root: Events_LineA
  • Rows 6-7: Default Items Name Root: Events_LineB
8
Create output words.
Creating Output Word Items
To create output items for local slave 01:
Step
Action
1
Click the Output tab to open the following page:
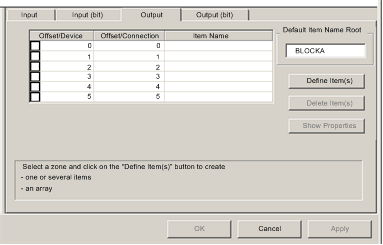
NOTE: In this example, each row represents a byte. Because the only item you will create is a 16-bit word, you will select 2 rows.
2
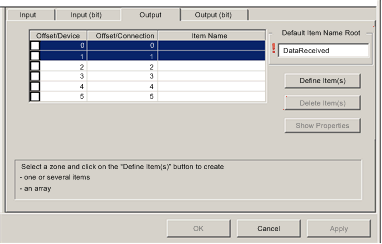
In the Default Item Name Root input box type: DataReceived.
3
Starting at the beginning of the table, select the first 2 rows, 0 and 1:
4
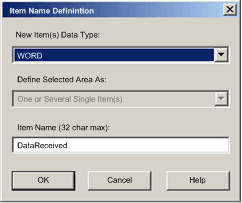
Click the Define Item(s) button.
Result: The Item Name Definition dialog opens:
5
Select WORD as the New Item(s) Data Type, then click OK.
Result: A new item is created:
6
Click OK to close the Items window.
7
Select File → Save to save your edits.
Using Local Slave Inputs and Outputs
The inputs and outputs created, above, are used as follows: