|


|
Original instructions
|
|
|
Original instructions
|
|
Backplane
|
Description
|
|---|---|
|
BMEXBP04001
|
4-slot Ethernet backplane
|
|
BMEXBP0400(H)1
|
4-slot hardened Ethernet backplane
|
|
BMEXBP08001
|
8-slot Ethernet backplane
|
|
BMEXBP0800(H)1
|
8-slot hardened Ethernet backplane
|
|
BMEXBP12001, 2
|
12-slot Ethernet backplane
|
|
BMEXBP1200(H)1, 2
|
12-slot hardened Ethernet backplane
|
|
BMEXBP0602 (H)
|
10-slot hardened Ethernet and X Bus backplane
|
|
BMEXBP1002 (H)
|
6-slot hardened Ethernet and X Bus backplane
|
|
1. In a local rack, slots 0 and 1 are reserved for the CPU.
2. In the 12-slot Ethernet backplane, slots 2, 8, 10, and 11 are X Bus only slots. You can install an Ethernet communication module in any other rack slot.
|
|
|
Step
|
Action
|
|---|---|
|
1
|
Turn off the power supply to the rack.
|
|
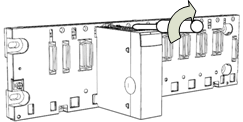
2
|
Remove the protective cover from the module interface on the rack.
|
|
3
|
a: Insert the locating pins on the bottom of the module into the corresponding slots in the rack.
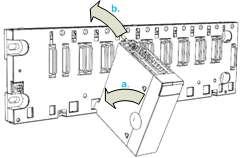 b: Use the locating pins as a hinge and pivot the module until it is flush with the rack. (The twin connector on the back of the module inserts into the connectors on the rack.)
|
|
4
|
Tighten the retaining screw to hold the module in place on the rack:
 Tightening torque: 0.4...1.5 N•m (0.30...1.10 lbf-ft).
|
  DANGER DANGER |
|
ELECTRICAL SHOCK HAZARD
Failure to follow these instructions will result in death or serious injury.
|
